
Grabado en pared LED: ¿Cómo eliminar el estroboscópico y el moiré?
¿Alguna vez has intentado filmar un sujeto frente a una pared LED masiva, solo para ver cómo el fondo se convierte en un caos parpadeante y caleidoscópico?
¿Alguna vez has intentado grabar a un sujeto frente a una enorme pantalla LED, solo para ver cómo el fondo se convierte en un caos parpadeante y caleidoscópico? Bienvenido al mundo de la grabación con paredes LED, donde el timing de la cámara y el de la pantalla a menudo chocan, produciendo un efecto estroboscópico pulsante o el infame patrón de moiré.

En esta guía:
1. Explicaremos por qué las paredes LED son propensas a artefactos visuales.
2. Describiremos los dos problemas más comunes: efecto estroboscópico como para moiré.
3. Proporcionaremos soluciones concretas, tanto técnicas como prácticas.
4. Compartiremos trucos profesionales y un flujo de trabajo de solución de problemas paso a paso.
En este artículo
- Por qué las paredes LED son un problema
- Efecto estroboscópico: la indeseable función de luces
- Patrón de moiré: La pesadilla de las interferencias
- Soluciones: Cómo pelear
- Técnicas avanzadas y trucos profesionales
- Flujo de trabajo para resolución de problemas: Su guía paso a paso
- Desarrollos futuros: Lo que viene a continuación
- Ejemplos de aplicación en el mundo real
- Conclusión: Su camino hacia el dominio de las pantallas LED
Por qué las paredes LED son un problema
Una pared LED es una cuadrícula gigante de diodos emisores de luz (LED). La pared tasa de refresco (cuántas veces se actualiza la cuadrícula por segundo) y de la cámara frecuencia de fotogramas (cuántos fotogramas capta por segundo) son sistemas de temporización independientes. Cuando las dos frecuencias son cercanas pero no perfectamente alineadas, el resultado es uno de los siguientes:
• un pulso rápido o “estroboscópico” del fondo (efecto strobe), o
• un conjunto de nuevos patrones ondulados o pixelados (moiré).
Piensa en ello como dos batería que tocan a tempos ligeramente diferentes: en lugar de armonía, obtienes ruido visual.
Efecto estroboscópico: la indeseable función de luces
¿Qué es el Efecto Stroboscópico?
El efecto estroboscópico aparece cuando la cámara capta el muro LED durante sus ciclos de “encendido/apagado”. Si el obturador de la cámara muestra una mezcla de estados de “encendido” y “apagado”.
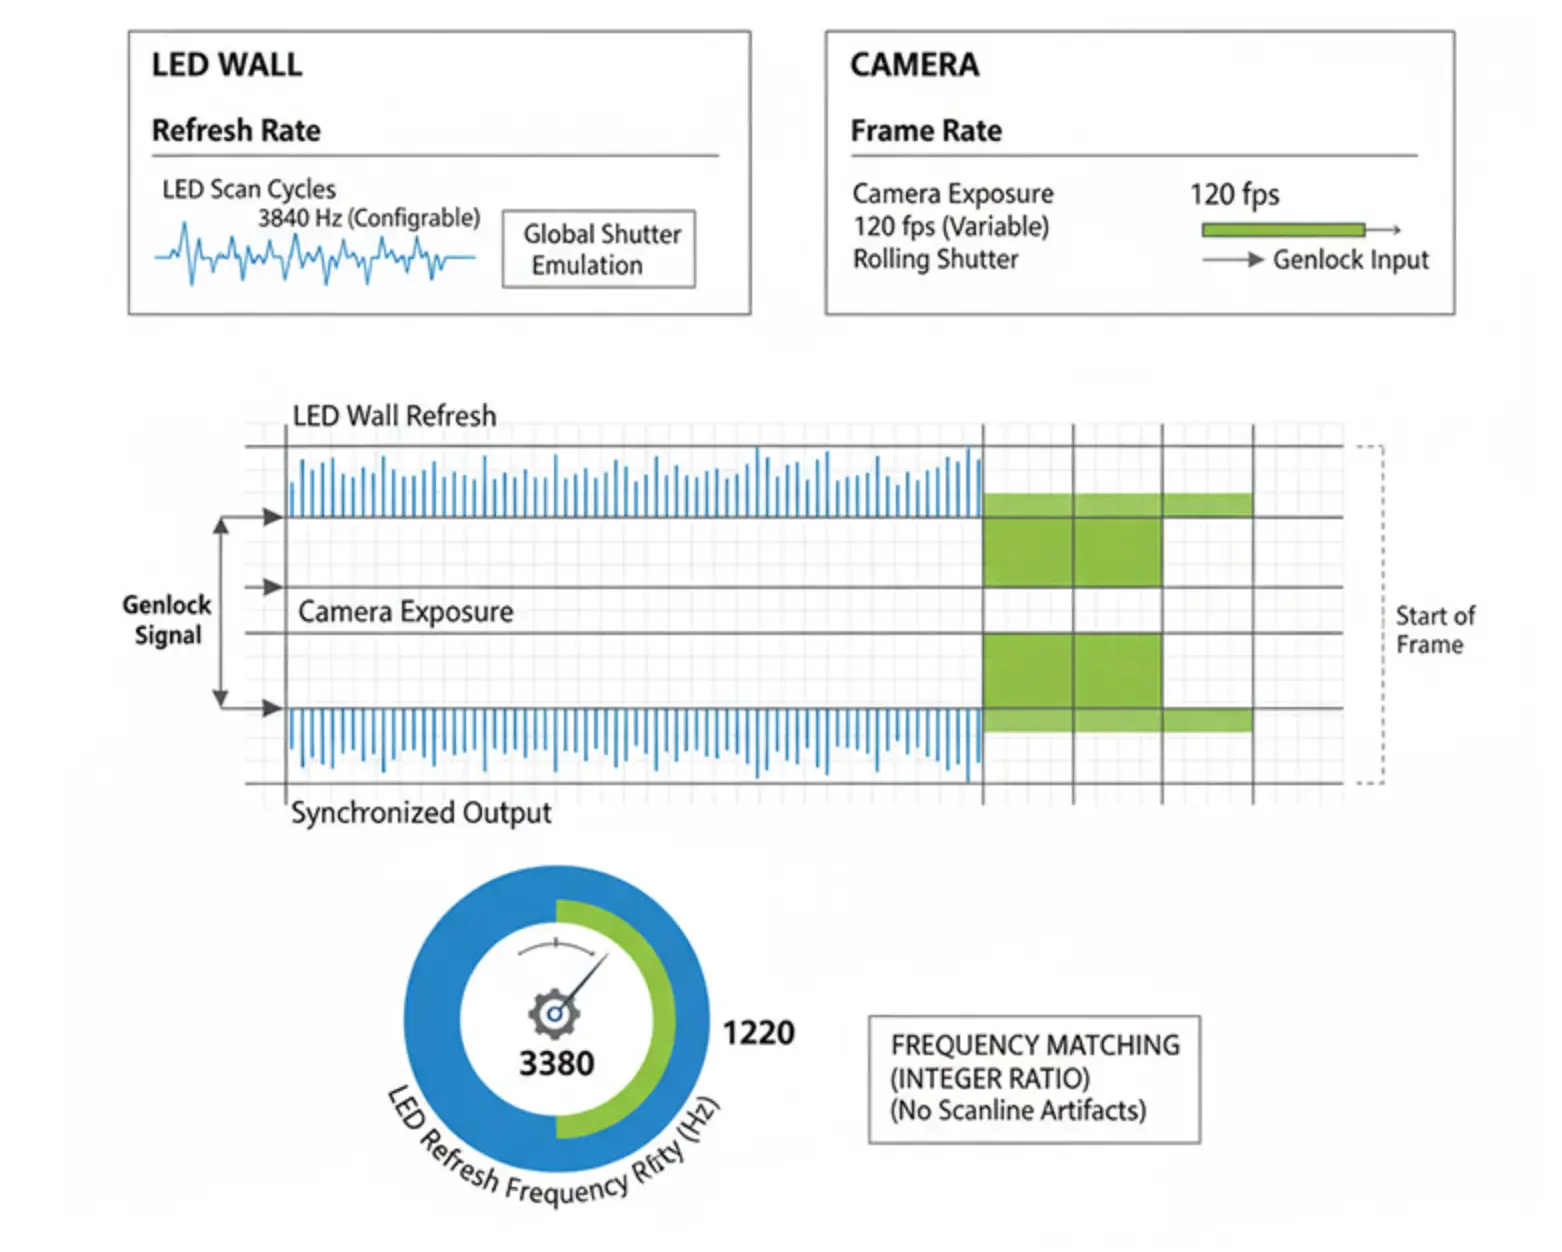
El muro LED no muestra contenido de forma continua en realidad; se actualiza rápidamente, típicamente 50-60 veces por segundo (o más). Tu cámara también toma fotos a intervalos específicos, normalmente 24, 30 o 60 fotogramas por segundo. Cuando estas dos frecuencias no se alinean perfectamente, obtienes el equivalente visual de dos metronomos marcando a velocidades ligeramente diferentes: el resultado es un efecto de parpadeo o titileo que puede hacer que todo el muro parezca parpadear o titilar.
¿Por qué ocurre esto?
Los muros LED utilizan una técnica llamada PWM (Pulse Width Modulation) to control brightness levels. Instead of varying the voltage, they turn the LEDs on and off very quickly, with the ratio of “on” time determining how bright each LED appears.
Think of it like trying to photograph a blinking light with a camera. If you catch it while it’s on, it’s bright. If you catch it while it’s off, it’s dim. If you catch it right as it’s transitioning, you get inconsistent brightness across the frame. Now multiply this by millions of LEDs, and you can see why things get complicated.
Patrón de moiré: La pesadilla de las interferencias
What is Moiré Pattern?
Moiré is an interference pattern created when two periodic grids—
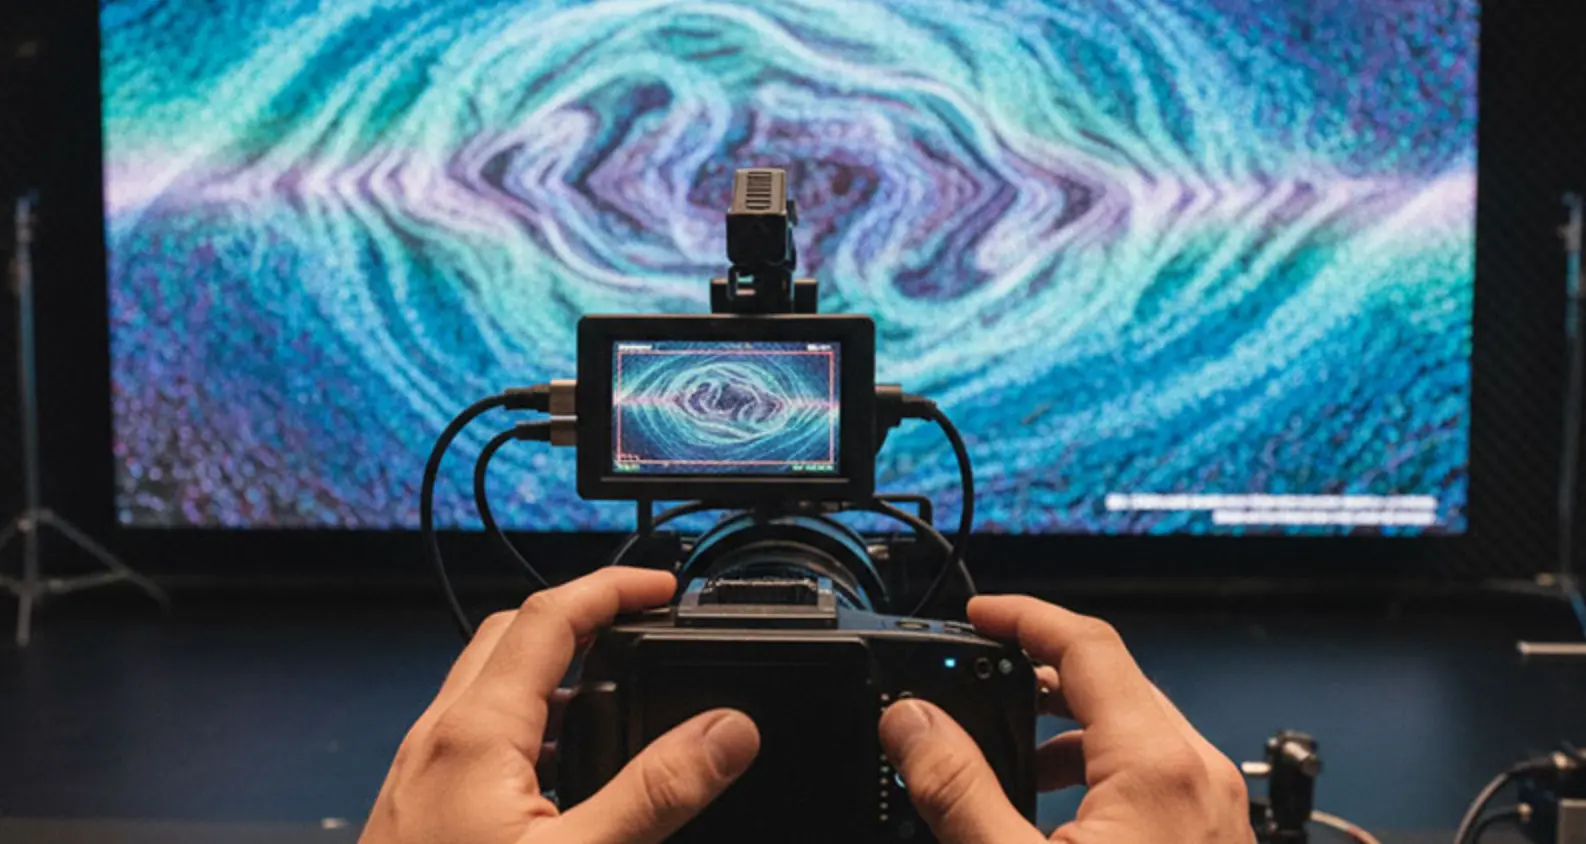
In LED wall shooting, moiré patterns occur when your camera’s sensor grid (the pixel array) interacts with the LED wall’s grid structure. Both are essentially repeating patterns of light and dark areas, and when they don’t align perfectly, they create new patterns that can make the wall appear to have wavy, swirling, or even pixelated effects that weren’t there in the original content.
The Mathematics Behind the Madness
Moiré is a manifestation of beat frequency: the difference between two spatial frequencies (the camera’s pixel pitch and the wall’s LED pitch). When two frequencies are close but not identical, they create a new frequency that’s the difference between them.
When your camera’s pixel pitch (the distance between pixels on your sensor) is roughly 1-3 times the LED pitch (the distance between LEDs on the wall),the interference becomes strongest, you’re in the danger zone.
Soluciones: Cómo pelear
Below is a consolidated toolbox. Choose the combination that works best for your setup.
Tackling Stroboscopic Effects
| Method | How it works | Tips |
| Frame‑rate alignment | Match your camera’s fps to the wall’s refresh rate (e.g., 60 Hz → 60 fps; 30 fps if the wall can sync). | Verify the actual refresh rate; some walls can output multiple rates depending on content. |
| Shutter speed (narrower angle) | Shorten exposure so each frame sees a single LED state. | Expect higher ISO or more lighting to compensate. |
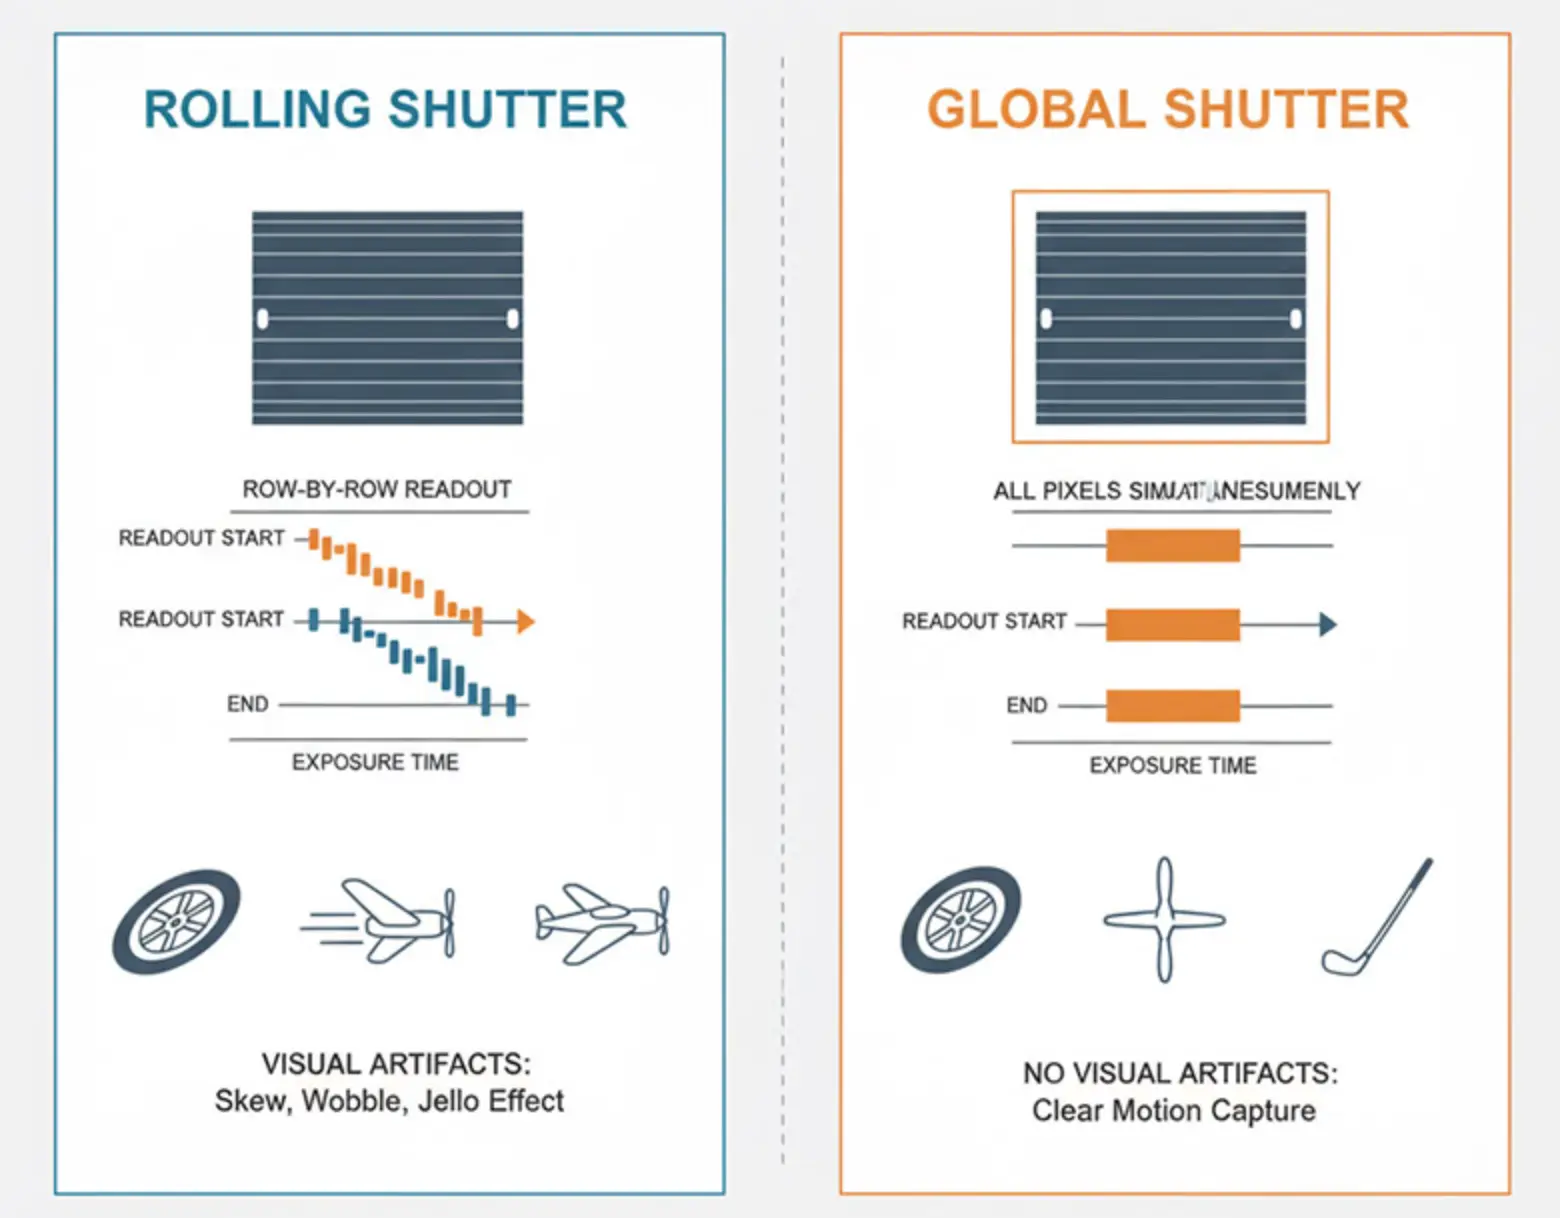
| Global‑shutter cameras | All pixels are read simultaneously, reducing “mixing” of LED states. | They are costlier but often worth it for critical shoots. |
| Readout modes (ERS/rolling‑shutter optimization) | Some cameras offer faster sensor readouts that can “skip” problematic cycles. | Check your camera’s menu for “fast readout” or “electronic shutter” options. |
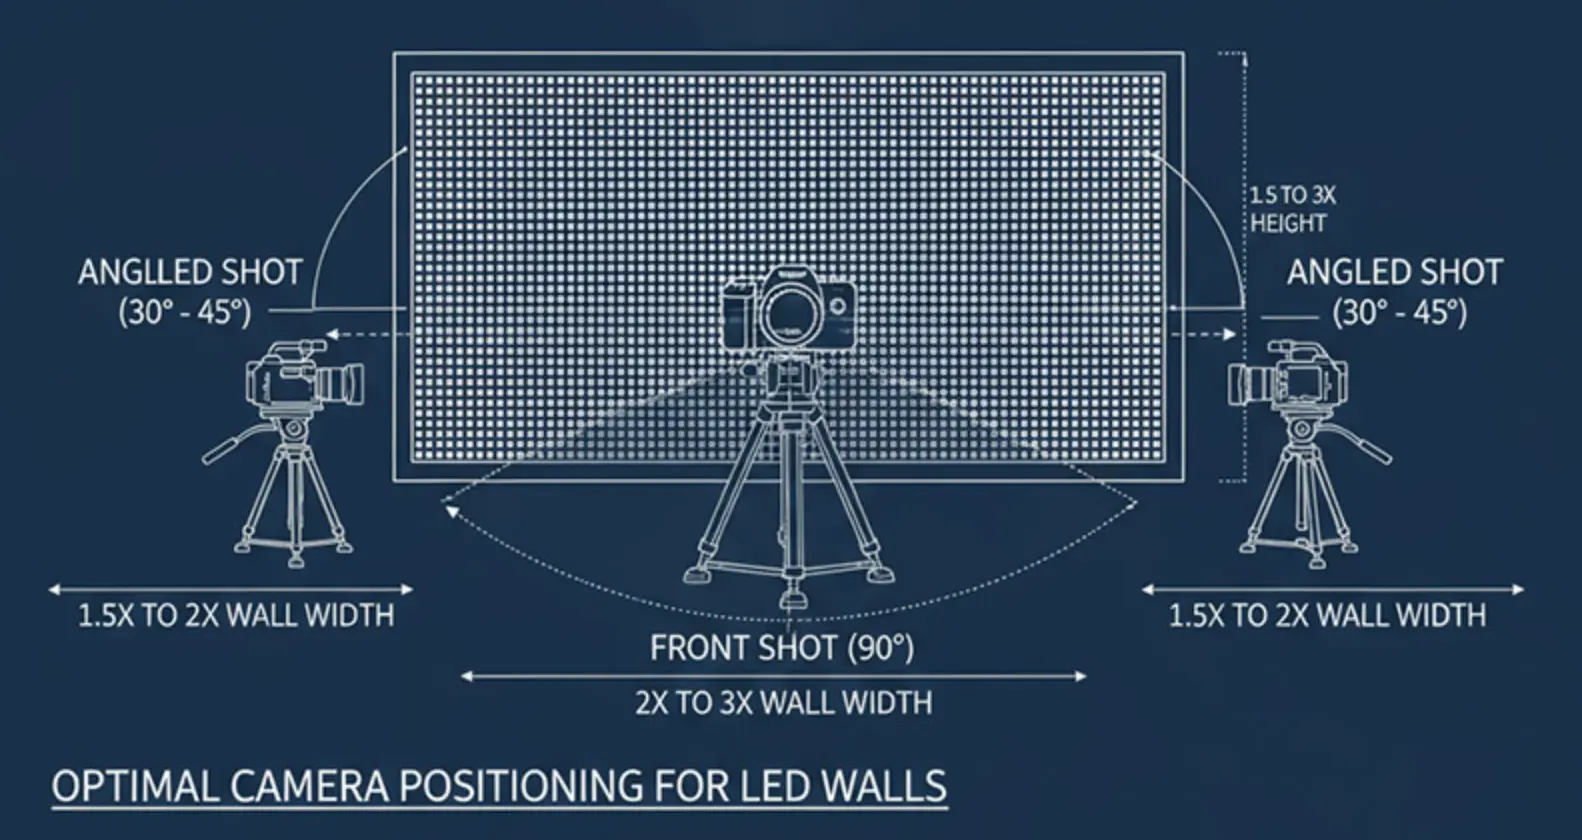
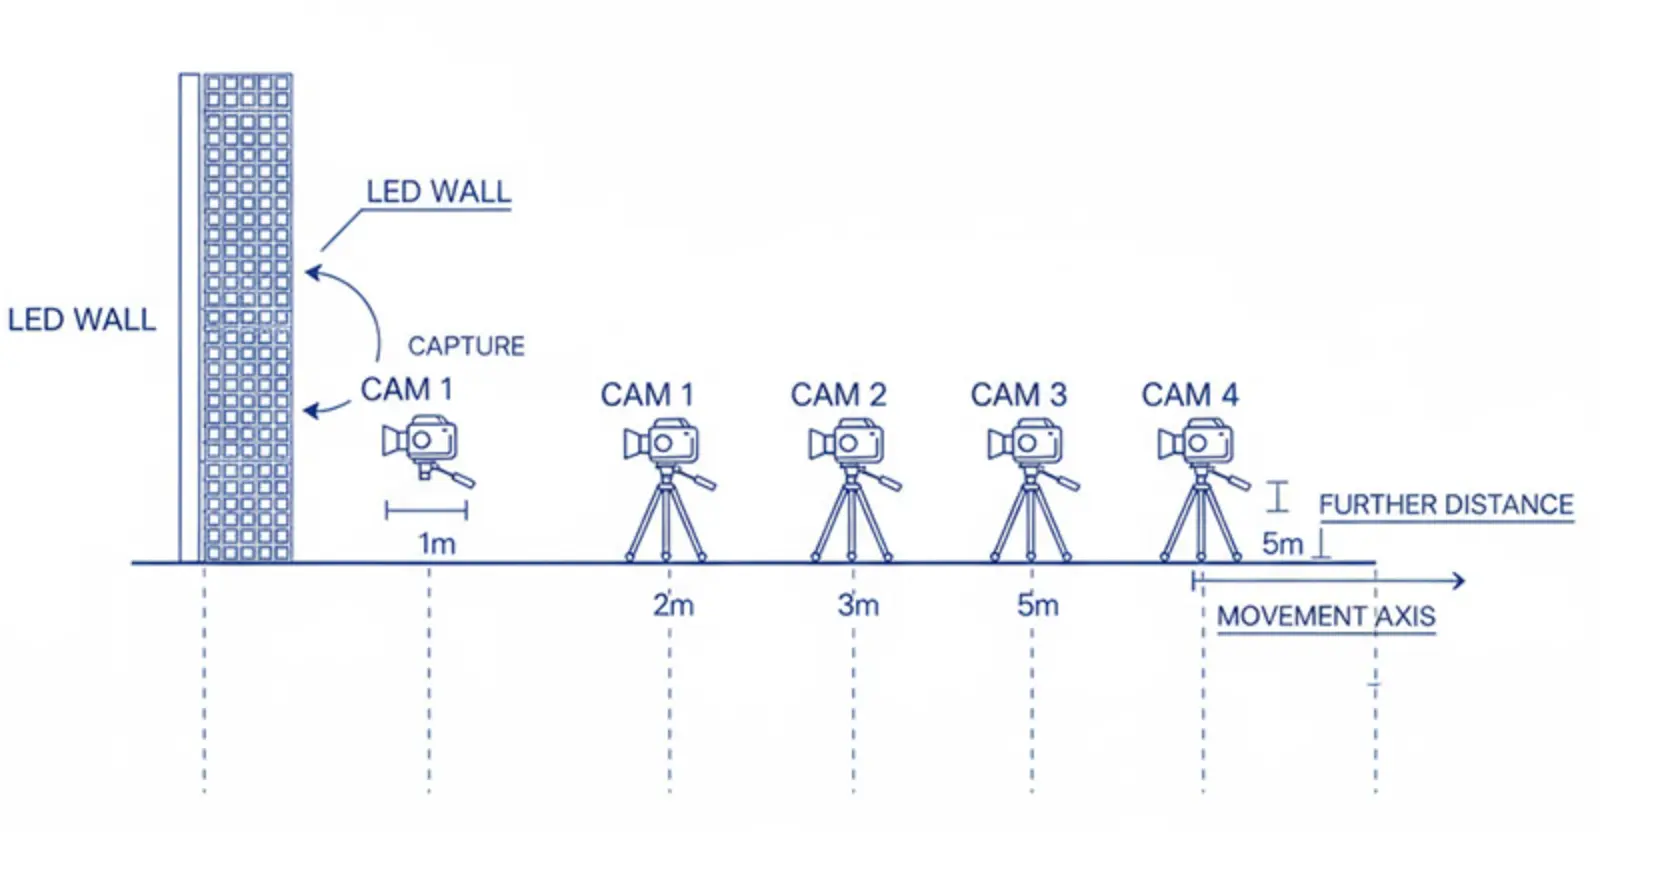
| Increase distance & angle | Greater camera‑wall separation reduces the proportion of the wall within the sensor’s field of view, lowering the chance of timing clashes. | A few extra meters can make a dramatic difference. |
| ND filters / aperture tweaks | Minor optical attenuation can dampen flicker without changing timing. | Use sparingly; they may reduce overall brightness. |
Conquering Moiré Patterns
| Method | How it works | Tips |
| Adjust distance & angle | Small changes (a few centimeters or a slight rotation) move the sensor‑grid relationship out of resonance. | Test incrementally; results can vary dramatically across inches. |
| Light defocus (slight out‑of‑focus) | A small focus blur smooths the interference pattern without softening the subject. | Keep blur minimal; over‑defocus can make the wall look hazy. |
| Pixel‑shift or sensor‑shift | Shifting the sensor (or using pixel‑shift technology) changes the sampling lattice relative to the LED grid. | Useful on high‑end mirrorless/DSLR models that support this. |
| Resolution mismatch | Choose a camera whose pixel count does not divide evenly into the wall’s pixel count (or vice‑versa). | If the wall is 1920×1080, a 24‑MP sensor often avoids the 1:1 ratio. |
| Dedicated “camera‑friendly” mode | Some LED walls have a mode that switches the PWM frequency to a pattern less likely to cause interference. | Expect a slight drop in color fidelity; test before shooting. |
Técnicas avanzadas y trucos profesionales
The Sweet Spot Method
Professional cinematographers often locate a sweet‑spot distance—a location where both stroboscopic and moiré artifacts are minimized. Achieving it typically requires a few test shots, but the result can differ markedly from positions just a few inches away.
Electronic Solutions
LED‑wall camera‑friendly presets – many manufacturers offer “broadcast” or “studio” modes that modify PWM and refresh patterns.
Real‑time synchronization – some high‑end systems can lock the wall’s refresh to the camera’s frame timing (e.g., Genlock or PTP), eliminating flicker outright.
Lighting Balance
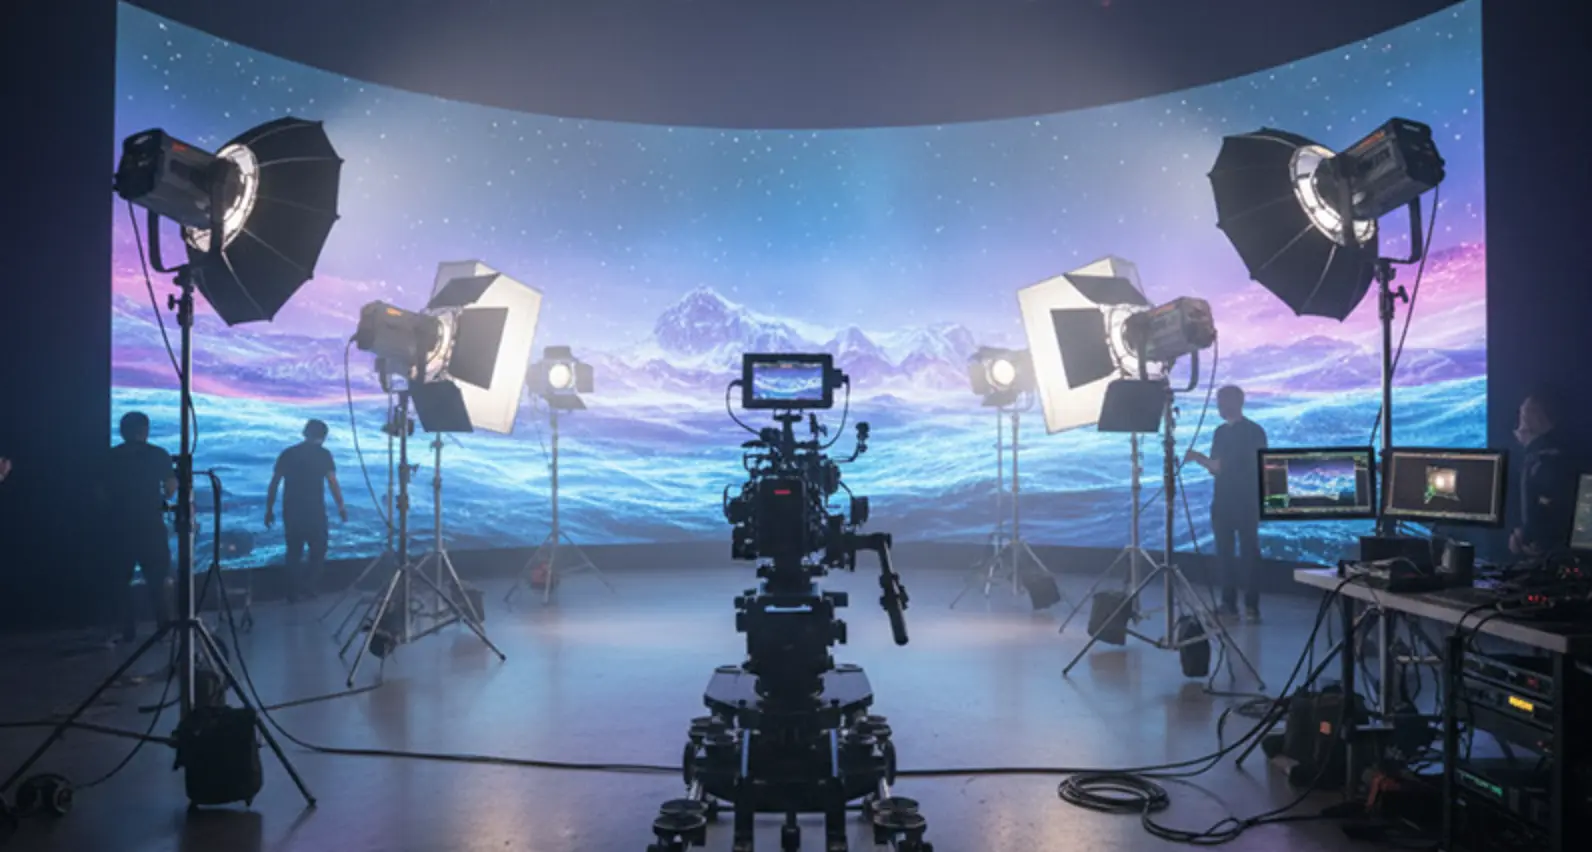
Use additional lights (softboxes, panels, or reflectors) to blend with the wall’s own illumination. Balancing the overall exposure reduces the perceived impact of any residual strobe or moiré, especially when the wall’s content is dynamic.
Flujo de trabajo para resolución de problemas: Su guía paso a paso
| Step | Action | What to Look For |
| 1️⃣ Pre‑shoot assessment | Review wall specs: refresh rate (Hz), pixel pitch, available “camera‑friendly” modes. | Note whether the wall can switch to 60 Hz, 50 Hz, 120 Hz, etc. |
| 2️⃣ Disparos de prueba | Realiza tomas con diversas combinaciones de fps/tiempo de obturación (p. ej., 24 fps + 1/48 s, 30 fps + 1/60 s, 60 fps + 1/120 s). | Observa la intensidad del parpadeo; elige el ajuste con el menor estrobo visible. |
| 3️⃣ Experimentos de posicionamiento | Comienza de cerca y luego aleja la cámara; también prueba con ángulos leves (5–10°). | Anota cualquier patrón de moiré; mantén el sujeto enfocado mientras ajustas. |
| 4️⃣ Ajuste fino | Realiza micromovimientos de distancia, ángulo y enfoque para minimizar ambos artefactos simultáneamente. | Idealmente, la pared debe ser lisa y el sujeto nítido. |
| 5️⃣ Verificación de contenido | Verifique que el contenido de la pared (movimiento rápido, patrones de alta frecuencia, colores sólidos) reaccione de manera diferente. | Para patrones de alta frecuencia, considere utilizar un ligero desenfocamiento o una cámara de mayor resolución. |
Desarrollos futuros: Lo que viene a continuación
La tecnología está en constante evolución. Estamos viendo paredes LED con tasas de refresco más altas, mejores modos de compatibilidad de cámara y sistemas que se ajustan automáticamente en función de la configuración de la cámara detectada. La tecnología de cámaras también avanza rápidamente, con nuevos sensores que utilizan algoritmos de procesamiento sofisticados para minimizar los artefactos electrónicos en la cámara.
Ejemplos de aplicación en el mundo real
Producción de eventos: Al filmar un concierto en vivo con fondos de escenario LED, el objetivo suele ser que el público perciba una experiencia visual sin costuras mientras se capturan imágenes de calidad de emisión para transmisión o grabación.
Eventos corporativos: Las paredes LED son cada vez más comunes en presentaciones corporativas, where executives might need to be filmed speaking in front of dynamic, branded backdrops.
Film and Television: From futuristic sci-fi scenes to contemporary dramas set in offices or homes, LED walls offer unprecedented flexibility in creating backgrounds that can change instantly.
Conclusión: Su camino hacia el dominio de las pantallas LED
LED wall shooting is fundamentally about understanding the relationship between camera sensors and LED display grids. The technical challenges of stroboscopic effects and moiré patterns require both technical knowledge and creative problem-solving skills.
Key Tkeaways:
• Stroboscopic effects occur when camera frame rates conflict with LED wall refresh rates; solution: match frame rates or adjust shutter speeds
• Moiré patterns result from sensor and LED grid interference; solution: change camera position, angle, or use slight defocus
• Distance is your friend – small positional adjustments can dramatically improve results
• Test extensively – each LED wall setup responds differently to camera settings
Content awareness: Some LED content is inherently more camera-friendly than others
By applying these principles—understanding the timing conflict, applying the appropriate technical fixes, and experimenting with positioning—you can turn LED‑wall shooting from a technical headache into a powerful creative asset.
Artículos Relacionados