
LEDウォールの撮影:ストロボやもアレパターンをどう除去するか
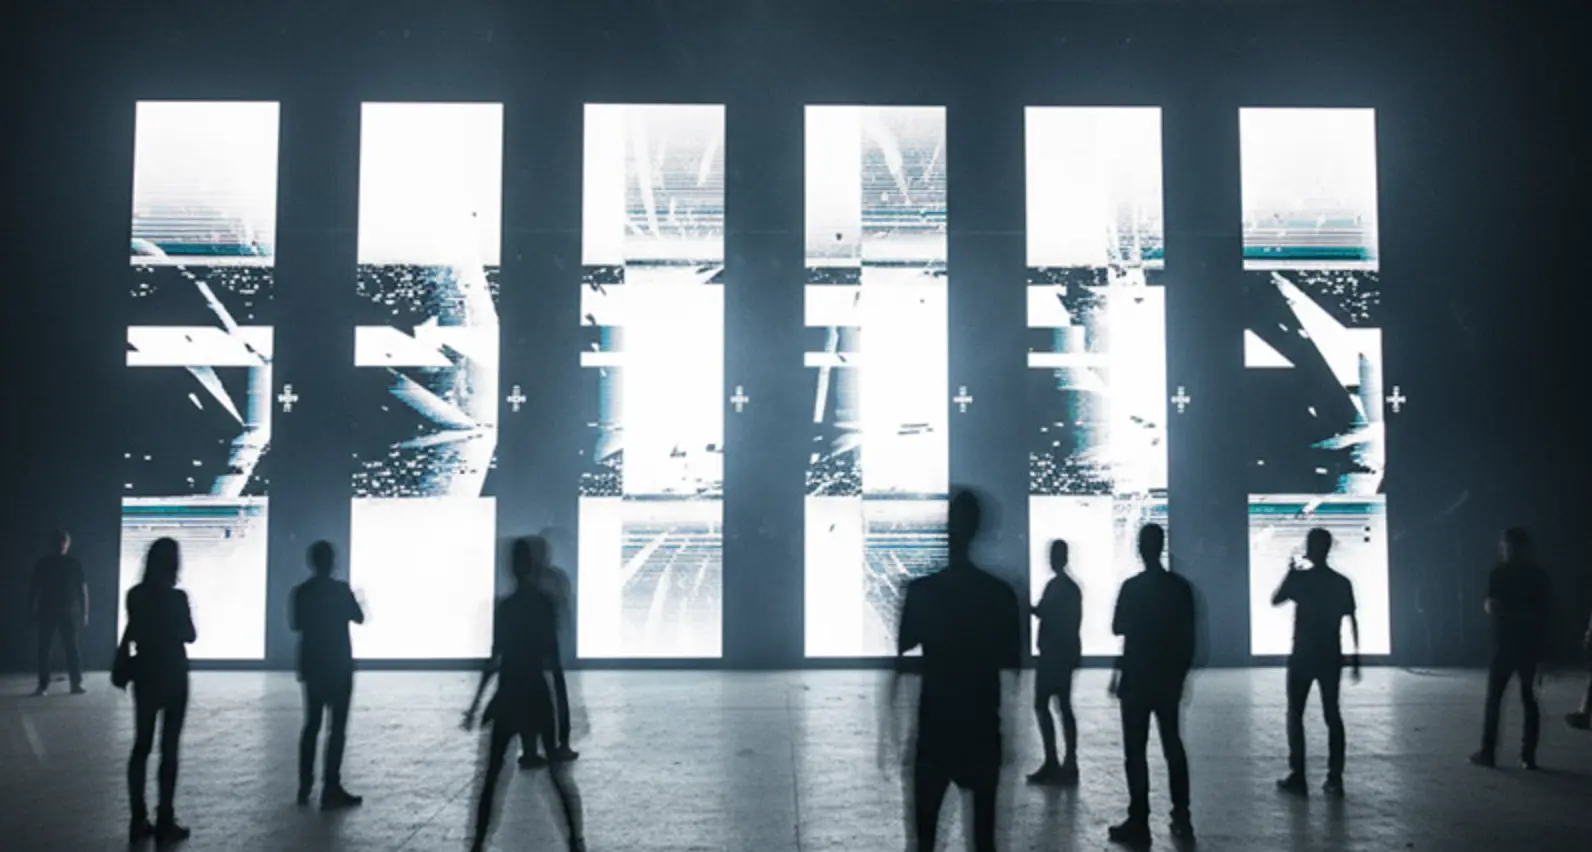
巨大なLEDウォールを背景に被写体を撮影したところ、背景がちらつく万華鏡のようなメッシーな状態になってしまうことってありませんか?
巨大なLEDウォール前面で被写体を撮影したことがあるのに、背景がフラッフラの万華鏡のような乱れに変わってしまうのを目の当たりにしたことはありませんか?ようこそ、LEDウォール撮影の世界へ。カメラのタイミングとディスプレイのタイミングがしばしば衝突し、脈打つストロボ効果や、有名なモアレ(縞模様)パターンが発生します。

本ガイドでは、以下を解説します:
1. LEDウォールが視覚的なアーティファクトに起因する理由.
2. 最も一般的な2つの問題の説明 ストロボスコープ効果 および モアレ.
3. 技術的・実用的な具体的な解決策の提供.
4. プロフェッショナルなテクニックとステップバイステップのトラブルシューティング手順の共有.
この記事の内容
- LEDウォールがトラブルメーカーとなる理由
- ストロボスコープ効果:望ましくない光のショー
- モアレパターン:干渉の悪夢
- 対策:反撃する方法
- 高度なテクニックとプロのトリック
- トラブルシューティングワークフロー:ステップバイステップのガイド
- 今後の展開:次に来るもの
- 実世界での応用例
- 結論:LEDウォールの達人への旅
LEDウォールがトラブルメーカーとなる理由
LEDウォールとは、発光ダイオード(LED)の巨大なグリッドです。ウォールの リフレッシュレート (グリッドが1秒間にどれだけ更新されるか)とカメラの フレームレート (1秒間に表示されるフレーム数)は独立したタイミングシステムです。2つの周波数が近づくものの完全に一致しない場合、結果は次のいずれかになります。
• 背景の高速な明滅や「ストローブ」現象(ストロボ効果)または
• 新しい波状または画素化されたパターン(モアレ)の出現。
2人のドラマーがわずかに異なるテンポで演奏していると思えば、調和の代わりに視覚的なノイズが生じます。
ストロボスコープ効果:望ましくない光のショー
ストロボ効果とは?
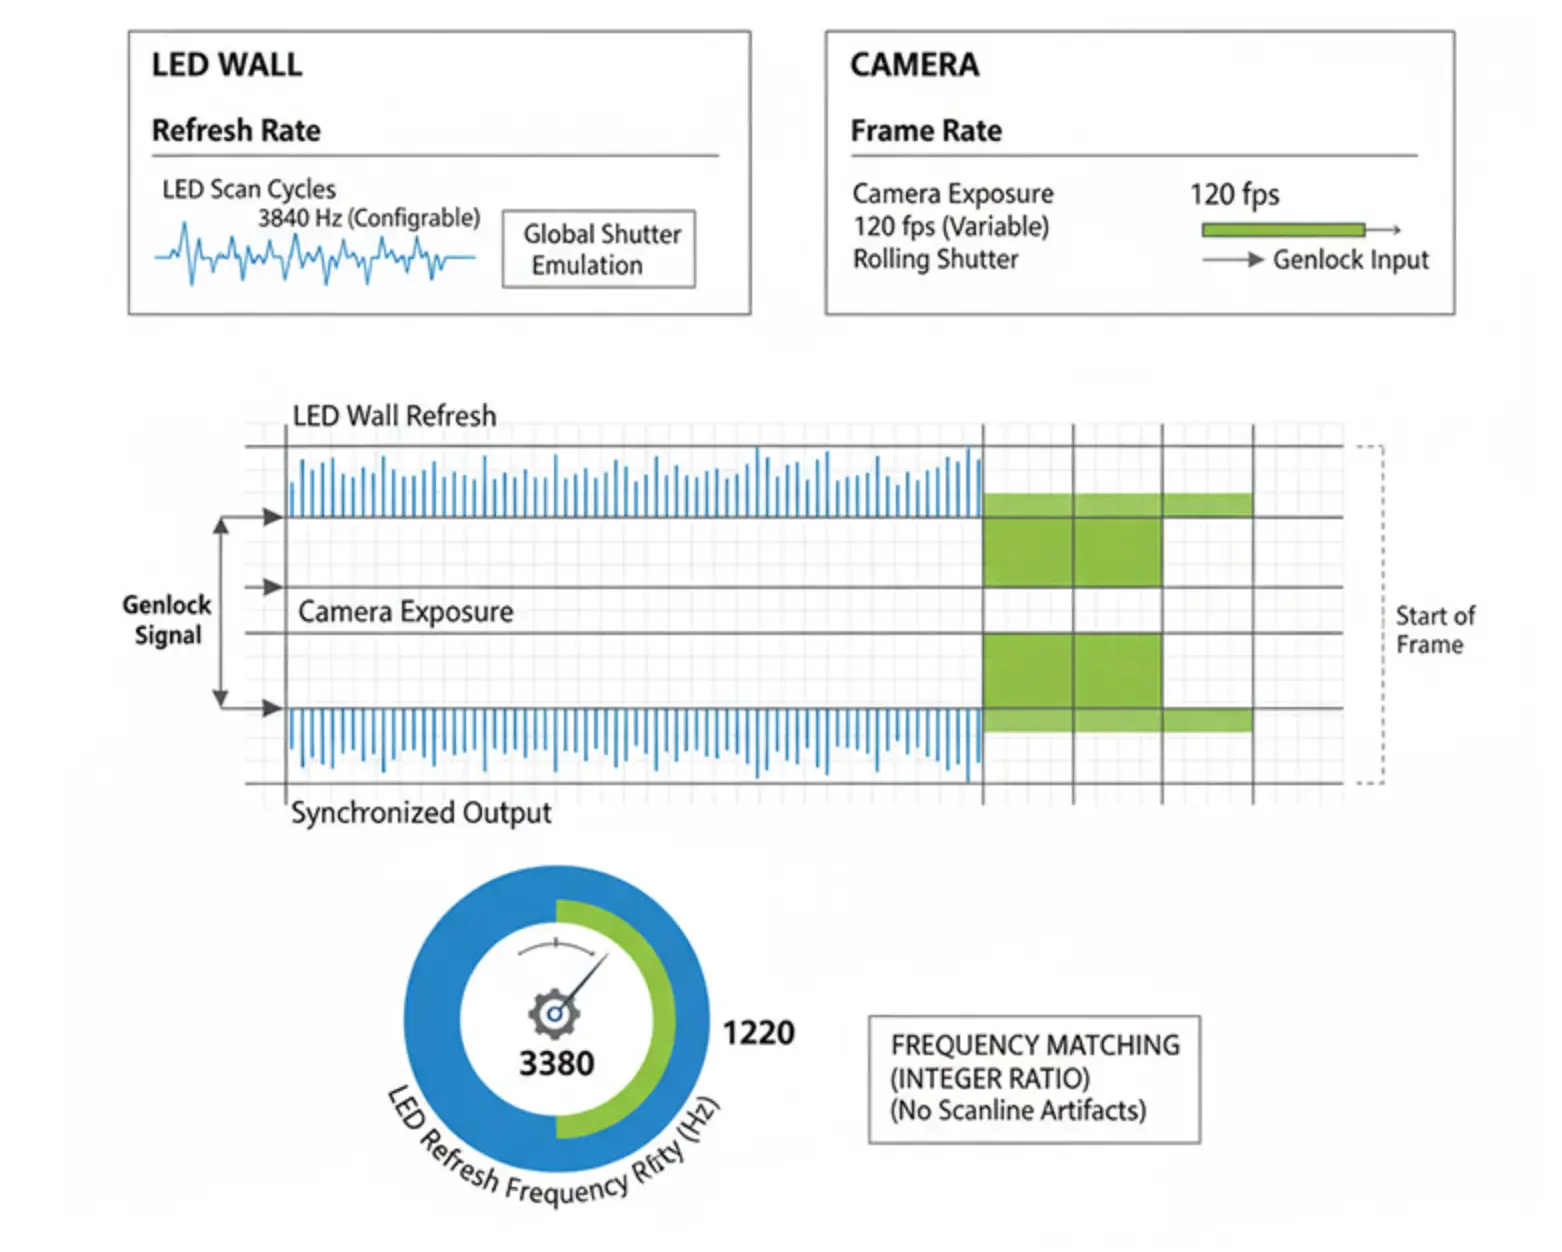
教育用LEDスクリーンの ストロボスコープ効果 LEDウォールが「オン/オフ」サイクルのときにカメラが撮影した場合に発生します。カメラのシャッターが「オン」と「オフ」の状態の混合をサンプリングした場合です。
LEDウォールは実際にコンテンツを連続的に表示しているわけではなく、通常、1秒に50〜60回(またはそれ以上)の高頻度でリフレッシュします。カメラも特定のインターバルで写真を撮りますが、通常は1秒あたり24、30、または60フレームです。この2つの周波数が完全に一致しない場合、わずかに異なる速度でチクタクと進む2つのメトロノームの視覚的同等物になります。その結果、ストローブまたはフラッシャーのように見える明滅やちらつき効果が発生します。
なぜこれが起こるのか?
LEDウォールは、 PWM (Pulse Width Modulation) to control brightness levels. Instead of varying the voltage, they turn the LEDs on and off very quickly, with the ratio of “on” time determining how bright each LED appears.
Think of it like trying to photograph a blinking light with a camera. If you catch it while it’s on, it’s bright. If you catch it while it’s off, it’s dim. If you catch it right as it’s transitioning, you get inconsistent brightness across the frame. Now multiply this by millions of LEDs, and you can see why things get complicated.
モアレパターン:干渉の悪夢
What is Moiré Pattern?
Moiré is an interference pattern created when two periodic grids—
In LED wall shooting, moiré patterns occur when your camera’s sensor grid (the pixel array) interacts with the LED wall’s grid structure. Both are essentially repeating patterns of light and dark areas, and when they don’t align perfectly, they create new patterns that can make the wall appear to have wavy, swirling, or even pixelated effects that weren’t there in the original content.
The Mathematics Behind the Madness
Moiré is a manifestation of beat frequency: the difference between two spatial frequencies (the camera’s pixel pitch and the wall’s LED pitch). When two frequencies are close but not identical, they create a new frequency that’s the difference between them.
When your camera’s pixel pitch (the distance between pixels on your sensor) is roughly 1-3 times the LED pitch (the distance between LEDs on the wall),the interference becomes strongest, you’re in the danger zone.
対策:反撃する方法
Below is a consolidated toolbox. Choose the combination that works best for your setup.
Tackling Stroboscopic Effects
| Method | How it works | Tips |
| Frame‑rate alignment | Match your camera’s fps to the wall’s refresh rate (e.g., 60 Hz → 60 fps; 30 fps if the wall can sync). | Verify the actual refresh rate; some walls can output multiple rates depending on content. |
| Shutter speed (narrower angle) | Shorten exposure so each frame sees a single LED state. | Expect higher ISO or more lighting to compensate. |
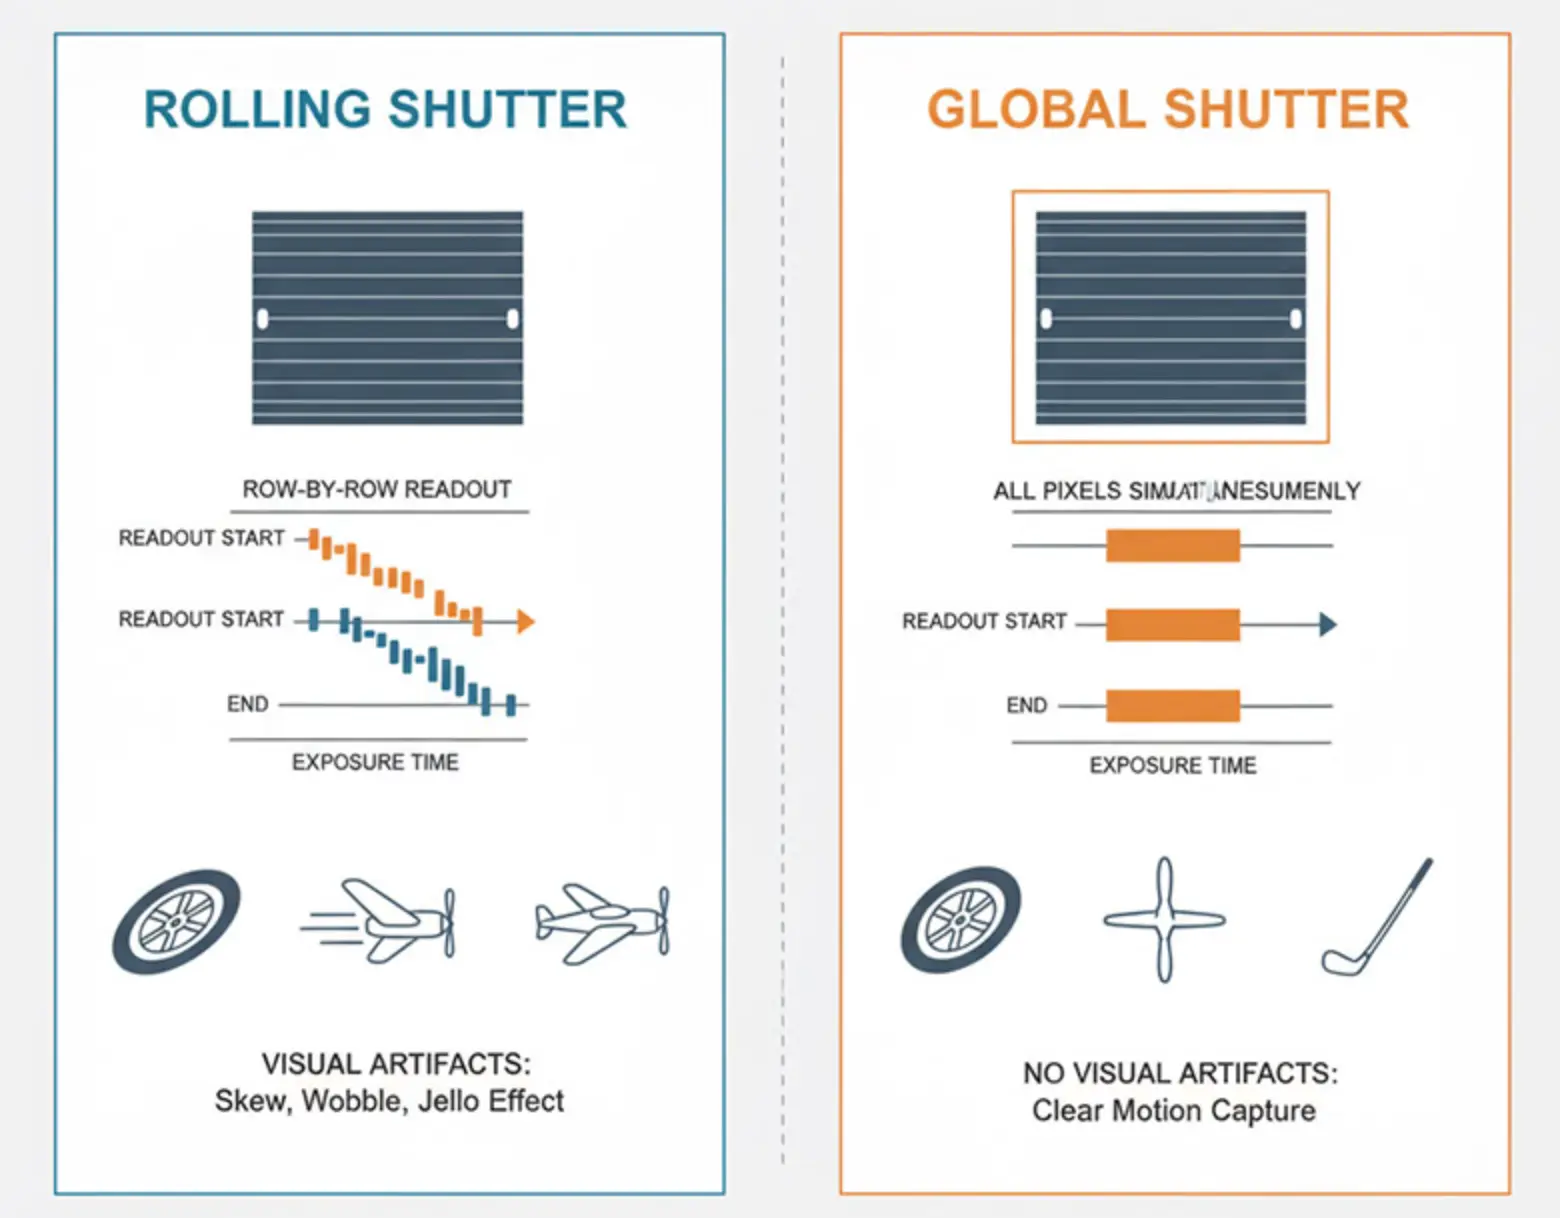
| Global‑shutter cameras | All pixels are read simultaneously, reducing “mixing” of LED states. | They are costlier but often worth it for critical shoots. |
| Readout modes (ERS/rolling‑shutter optimization) | Some cameras offer faster sensor readouts that can “skip” problematic cycles. | Check your camera’s menu for “fast readout” or “electronic shutter” options. |
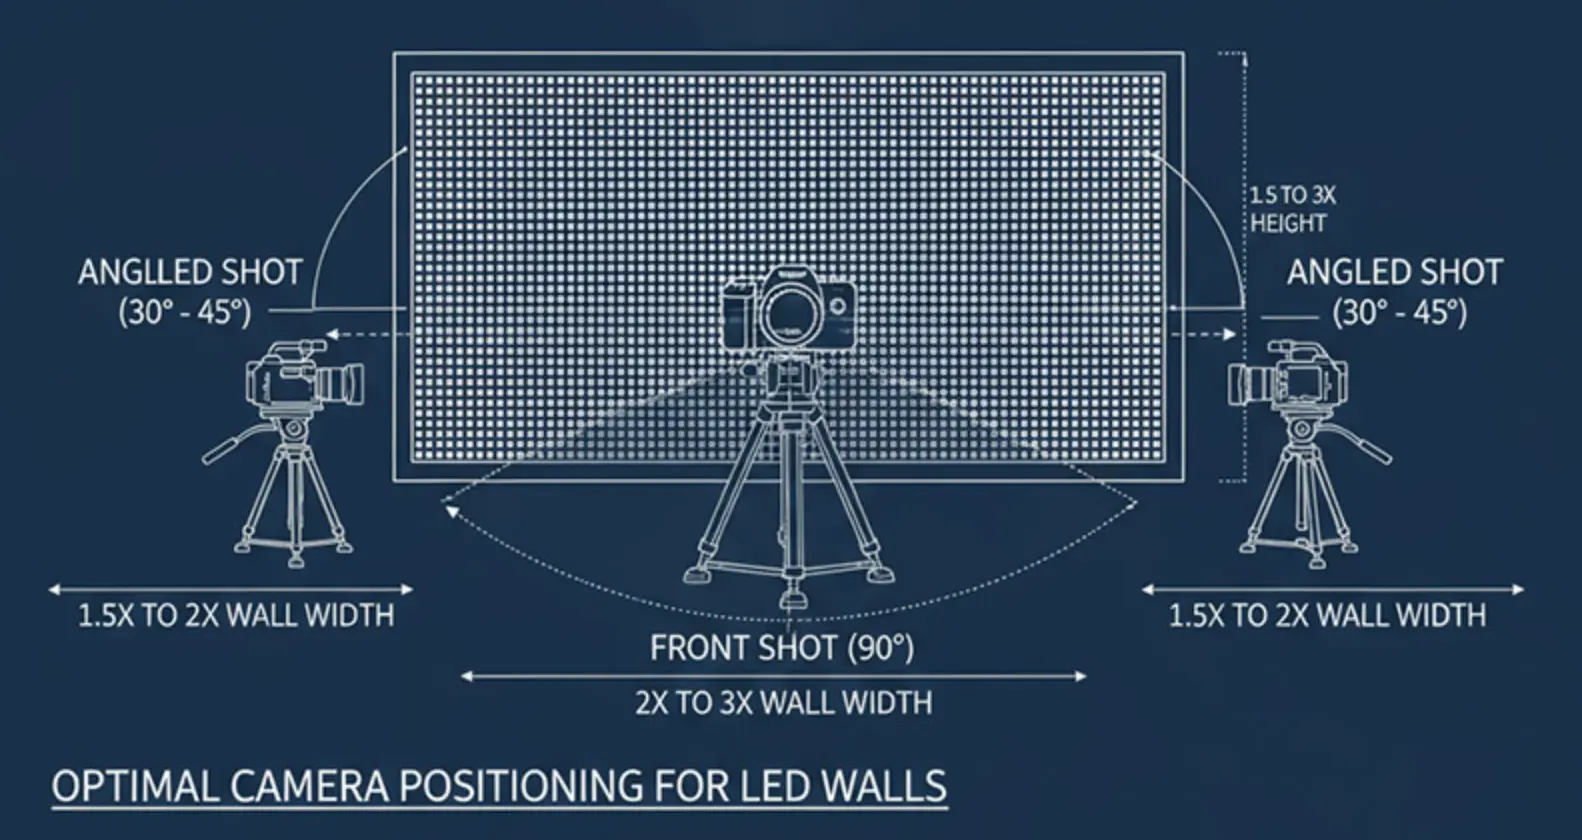
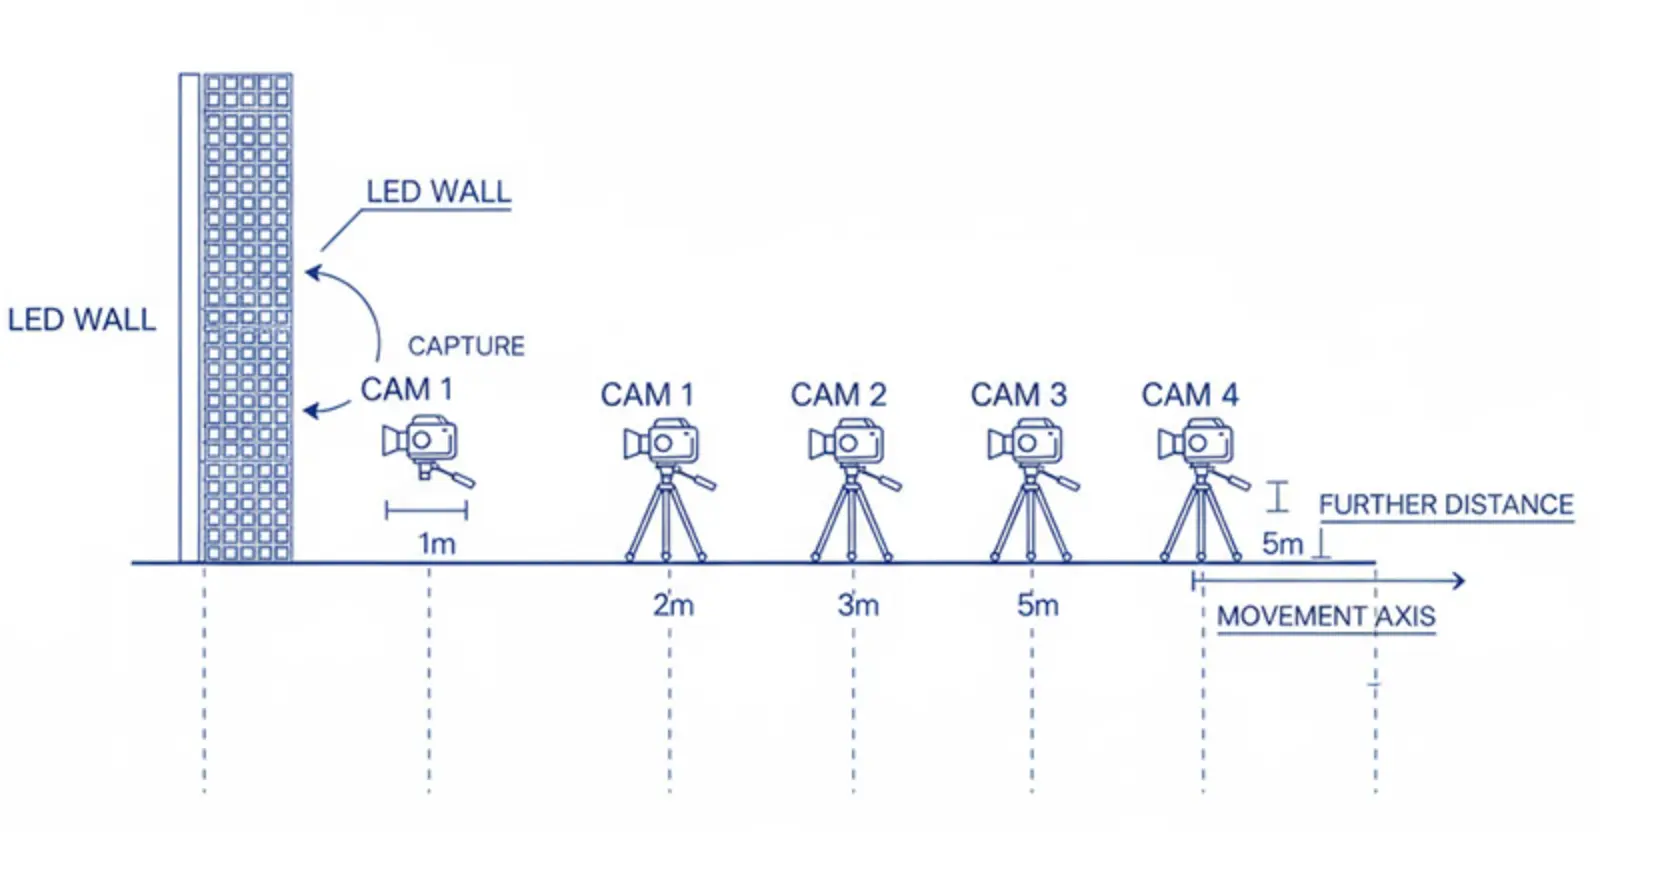
| Increase distance & angle | Greater camera‑wall separation reduces the proportion of the wall within the sensor’s field of view, lowering the chance of timing clashes. | A few extra meters can make a dramatic difference. |
| ND filters / aperture tweaks | Minor optical attenuation can dampen flicker without changing timing. | Use sparingly; they may reduce overall brightness. |
Conquering Moiré Patterns
| Method | How it works | Tips |
| Adjust distance & angle | Small changes (a few centimeters or a slight rotation) move the sensor‑grid relationship out of resonance. | Test incrementally; results can vary dramatically across inches. |
| Light defocus (slight out‑of‑focus) | A small focus blur smooths the interference pattern without softening the subject. | Keep blur minimal; over‑defocus can make the wall look hazy. |
| Pixel‑shift or sensor‑shift | Shifting the sensor (or using pixel‑shift technology) changes the sampling lattice relative to the LED grid. | Useful on high‑end mirrorless/DSLR models that support this. |
| Resolution mismatch | Choose a camera whose pixel count does not divide evenly into the wall’s pixel count (or vice‑versa). | If the wall is 1920×1080, a 24‑MP sensor often avoids the 1:1 ratio. |
| Dedicated “camera‑friendly” mode | Some LED walls have a mode that switches the PWM frequency to a pattern less likely to cause interference. | Expect a slight drop in color fidelity; test before shooting. |
高度なテクニックとプロのトリック
The Sweet Spot Method
Professional cinematographers often locate a sweet‑spot distance—a location where both stroboscopic and moiré artifacts are minimized. Achieving it typically requires a few test shots, but the result can differ markedly from positions just a few inches away.
Electronic Solutions
LED‑wall camera‑friendly presets – many manufacturers offer “broadcast” or “studio” modes that modify PWM and refresh patterns.
Real‑time synchronization – some high‑end systems can lock the wall’s refresh to the camera’s frame timing (e.g., Genlock or PTP), eliminating flicker outright.
Lighting Balance
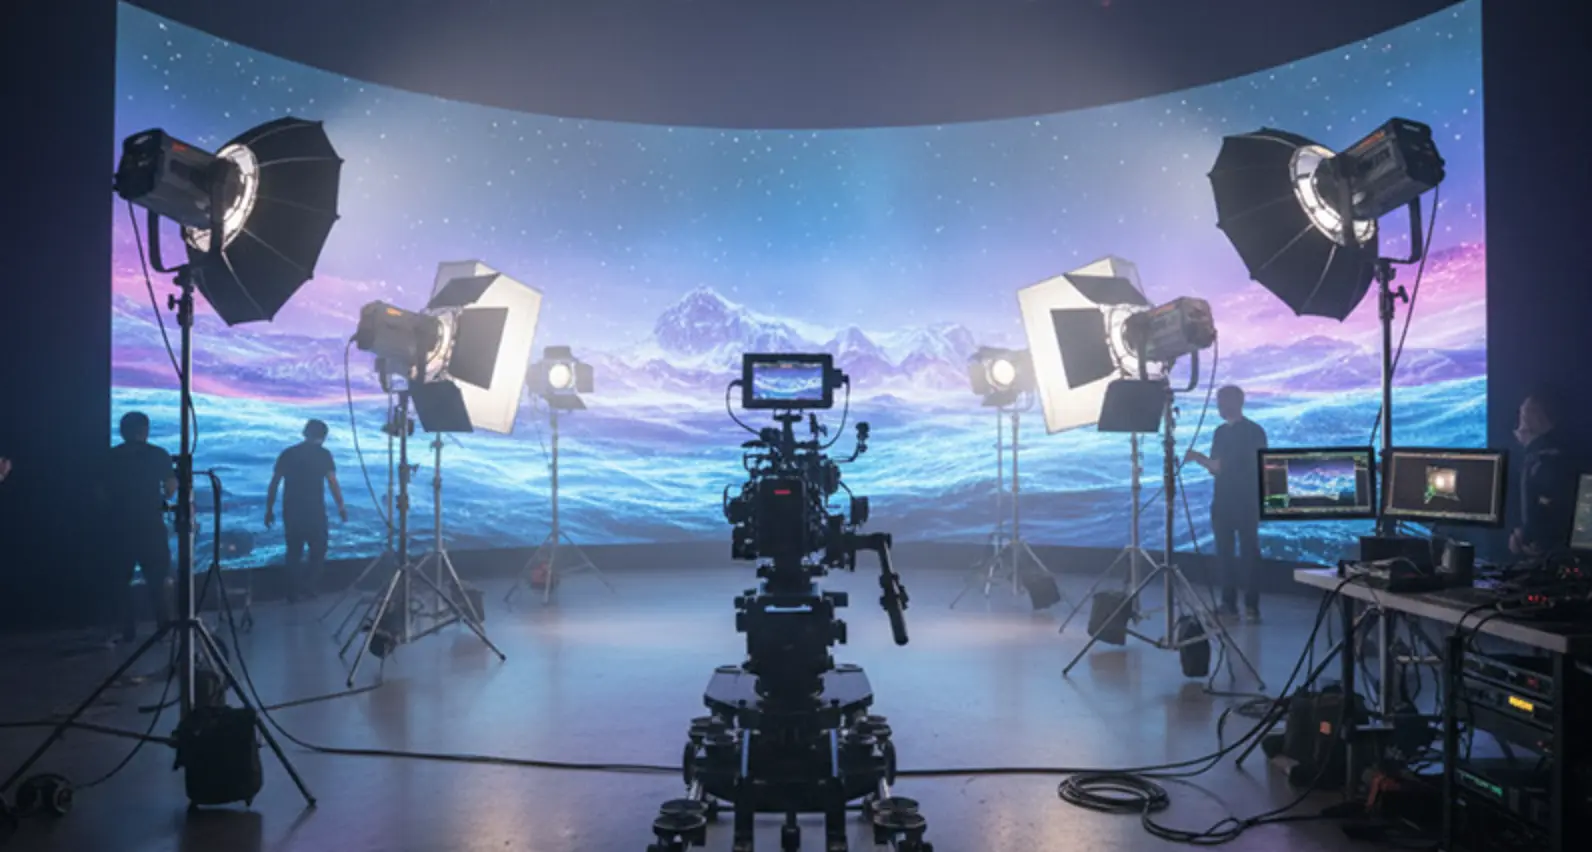
Use additional lights (softboxes, panels, or reflectors) to blend with the wall’s own illumination. Balancing the overall exposure reduces the perceived impact of any residual strobe or moiré, especially when the wall’s content is dynamic.
トラブルシューティングワークフロー:ステップバイステップのガイド
| Step | Action | What to Look For |
| 1️⃣ Pre‑shoot assessment | Review wall specs: refresh rate (Hz), pixel pitch, available “camera‑friendly” modes. | Note whether the wall can switch to 60 Hz, 50 Hz, 120 Hz, etc. |
| 2️⃣ テストショット | さまざまなfps/シャッター組み合わせ(例:24fps + 1/48s、30fps + 1/60s、60fps + 1/120s)で撮影してみてください。 | フリッカーの強さを観察し、ストローブが最も見えにくい設定を選択してください。 |
| 3️⃣ 配置の実験 | まず近くから撮影し、カメラを離していきます。また、わずかな角度(5〜10°)でも試みてください。 | モーレ縞が見えたら記録し、調整中は被写体にピントを合した状態を維持してください。 |
| 4️⃣ ファインチューニング(微調整) | 距離、角度、ピントをわずかに調整し、アーティファクトを同時に最小限に抑えましょう。 | 壁が滑らかで、被写体が鮮明になることが理想です。 |
| 5️⃣ コンテンツチェック | 壁面(ウォール)のコンテンツ(高速モーション、高周波パターン、単色)が異なる反応を示すことを確認してください。 | 高周波パターンについては、わずかなデフォーカスや高解像度カメラの使用を検討してください。 |
今後の展開:次に来るもの
技術は絶えず進化しています。より高いリフレッシュレート、より優れたカメラ互換モード、検出されたカメラ設定に基づいて自動調整されるシステムなど、LEDウォールが目覚ましい進化を遂げています。カメラ技術も急速に発展しており、複雑な処理アルゴリズムを使用した新しいセンサーにより、カメラ内で電子ノイズを最小限に抑えることが可能になっています。
実世界での応用例
イベント制作:ライブコンサートでの撮影において、 LEDステージ背景, を使用する場合、観客が無縫い(シームレス)なビジュアル体験を感じると同時に、配信や録画向けに放送品質の映像を撮影することが目標となります。
コーポレートイベント:LEDウォールはますます 企業プレゼンテーションで普及しています、幹部がブランド調のダイナミックな背景の前で話す様子を撮影する必要がある場合など、
映画・テレビドラマ:SF的な未来的なシーンから、オフィスや住宅を舞台にした現代劇まで、LEDウォールは前例のない柔軟性で 即座に変化させることのできる背景の作成が可能になります.
結論:LEDウォールの達人への旅
LEDウォール撮影は、カメラセンサーとLED表示グリッドの関係を理解することがその根本です。ストロボスコープ効果やモアレパターンの技術的な課題には、技術的な知識と創造的な問題解決力が求められます。
重要なポイント:
・ストロボスコープ効果 は、カメラのフレームレートとLEDウォールのリフレッシュレートが競合すると発生します。解決策:フレームレートを一致させたり、シャッター速度を調整したりする
・モアレパターン は、センサーとLEDグリッドの干渉により生じます。解決策:カメラの位置や角度を変更するか、わずかなデフォーカスを使用する
• Distance is your friend – small positional adjustments can dramatically improve results
• Test extensively – each LED wall setup responds differently to camera settings
Content awareness: Some LED content is inherently more camera-friendly than others
By applying these principles—understanding the timing conflict, applying the appropriate technical fixes, and experimenting with positioning—you can turn LED‑wall shooting from a technical headache into a powerful creative asset.
関連記事