
การถ่ายทำภาพหน้าจอ LED: วิธีกำจัดอาการสั่นกระพริบและลวดลายโมเร
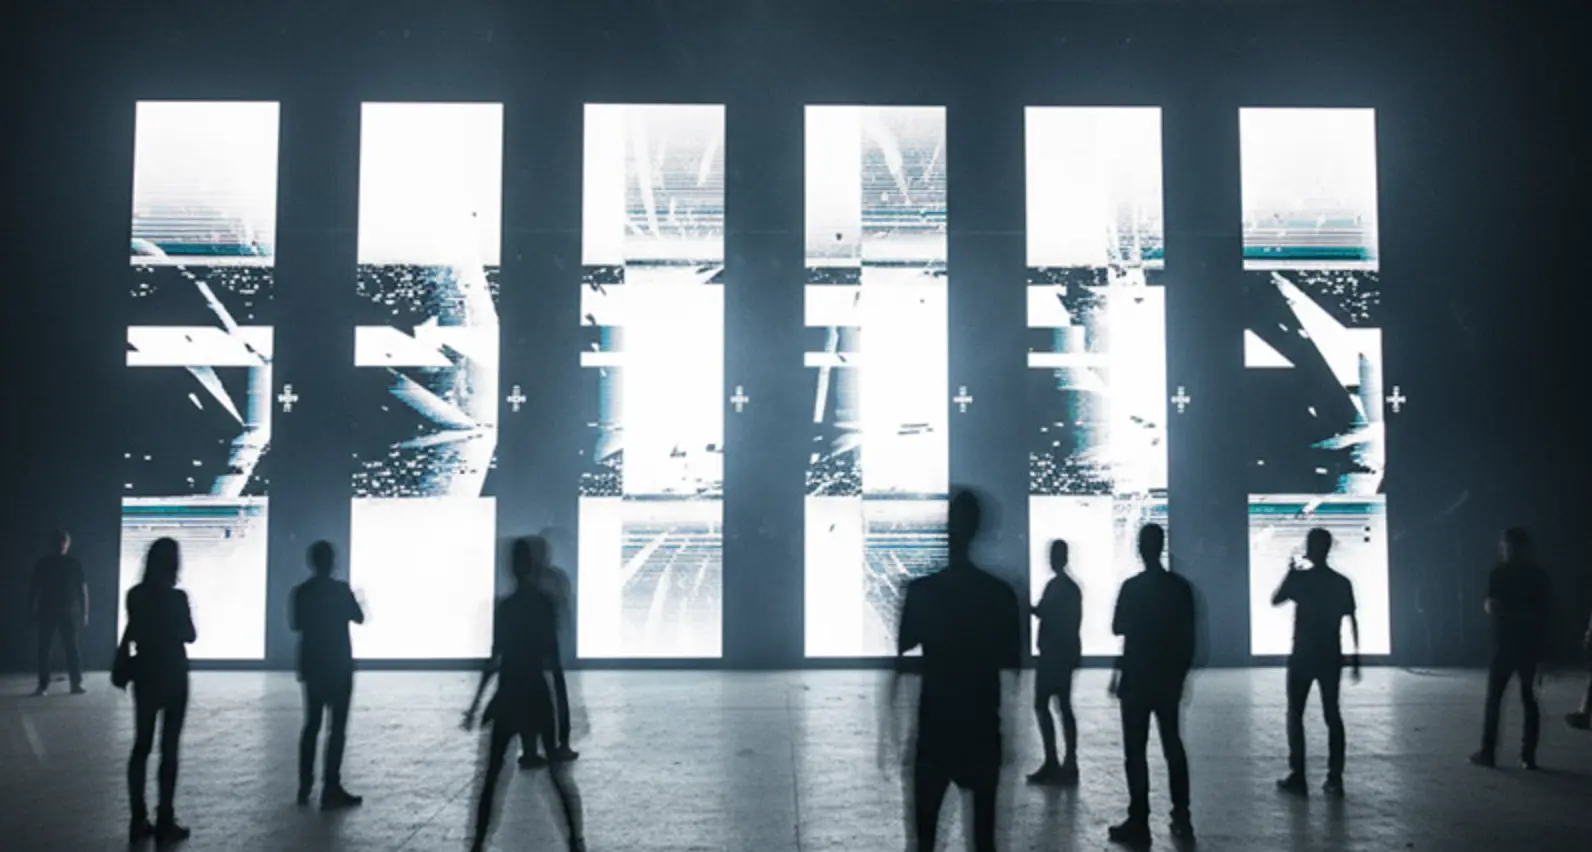
เคยลองถ่ายวิดีโอบนวัตถุหรือบุคคลที่อยู่หน้าผนังจอ LED ขนาดมหึมาหรือไม่ ที่กลับพบว่าฉากหลังกลับกลายเป็นความวุ่นวายที่กะพริบสลับสีราวกับกระจก kaleidoscopic?
เคยลองถ่ายทำวิดีโอโดยวางตัวแบบอยู่หน้าจอ LED ขนาดยักษ์ แล้วต้องเห็นพื้นหลังกลายเป็นภาพกระพริบวุ่นวายเหมือนลูกคิดไหม? ยินดีต้อนรับสู่โลกของการถ่ายทำกับหน้าจอ LED - ที่ซึ่งจังหวะเวลาของกล้องและจังหวะเวลาของหน้าจอ มักจะขัดแย้งกัน สร้างความกระพริบเหมือน “แสงสตาร์บ” หรือลวดลายโมเร (moiré) อันลือลั่น.

ในคู่มือฉบับนี้ เราจะ:
1. อธิบายว่าทำไมจอ LED ถึงเกิดปัญหาภาพได้ง่าย.
2. บรรยายปัญหาที่พบบ่อยที่สุดสองประการ: ผลสโตรโบสโคปิก (Stroboscopic effect) และ ลวดลายโมเร (Moiré).
3. ให้แนวทางแก้ไขที่ชัดเจน ทั้งด้านเทคนิคและด้านปฏิบัติ.
4. แบ่งปันเทคนิคเชิงมืออาชีพและขั้นตอนการแก้ไขปัญหาทีละขั้นตอน.
ในบทความนี้
- ทำไมจอ LED ถึงก่อปัญหา
- ผลสโตรโบสโคปิก: การแสดงแสงที่ไม่พึงประสงค์
- ลายมัวเร (Moiré Pattern): ปัญหาการรบกวน
- แนวทางแก้ไข: วิธีรับมือ
- เทคนิคขั้นสูงและเคล็ดลับระดับมืออาชีพ
- ขั้นตอนการแก้ไขปัญหา: คู่มือทีละขั้นตอน
- การพัฒนาในอนาคต: สิ่งที่จะเกิดขึ้นต่อไป
- ตัวอย่างการประยุกต์ใช้จริง
- สรุป: เส้นทางสู่การเป็นมืออาชีพด้านจอ LED
ทำไมจอ LED ถึงก่อปัญหา
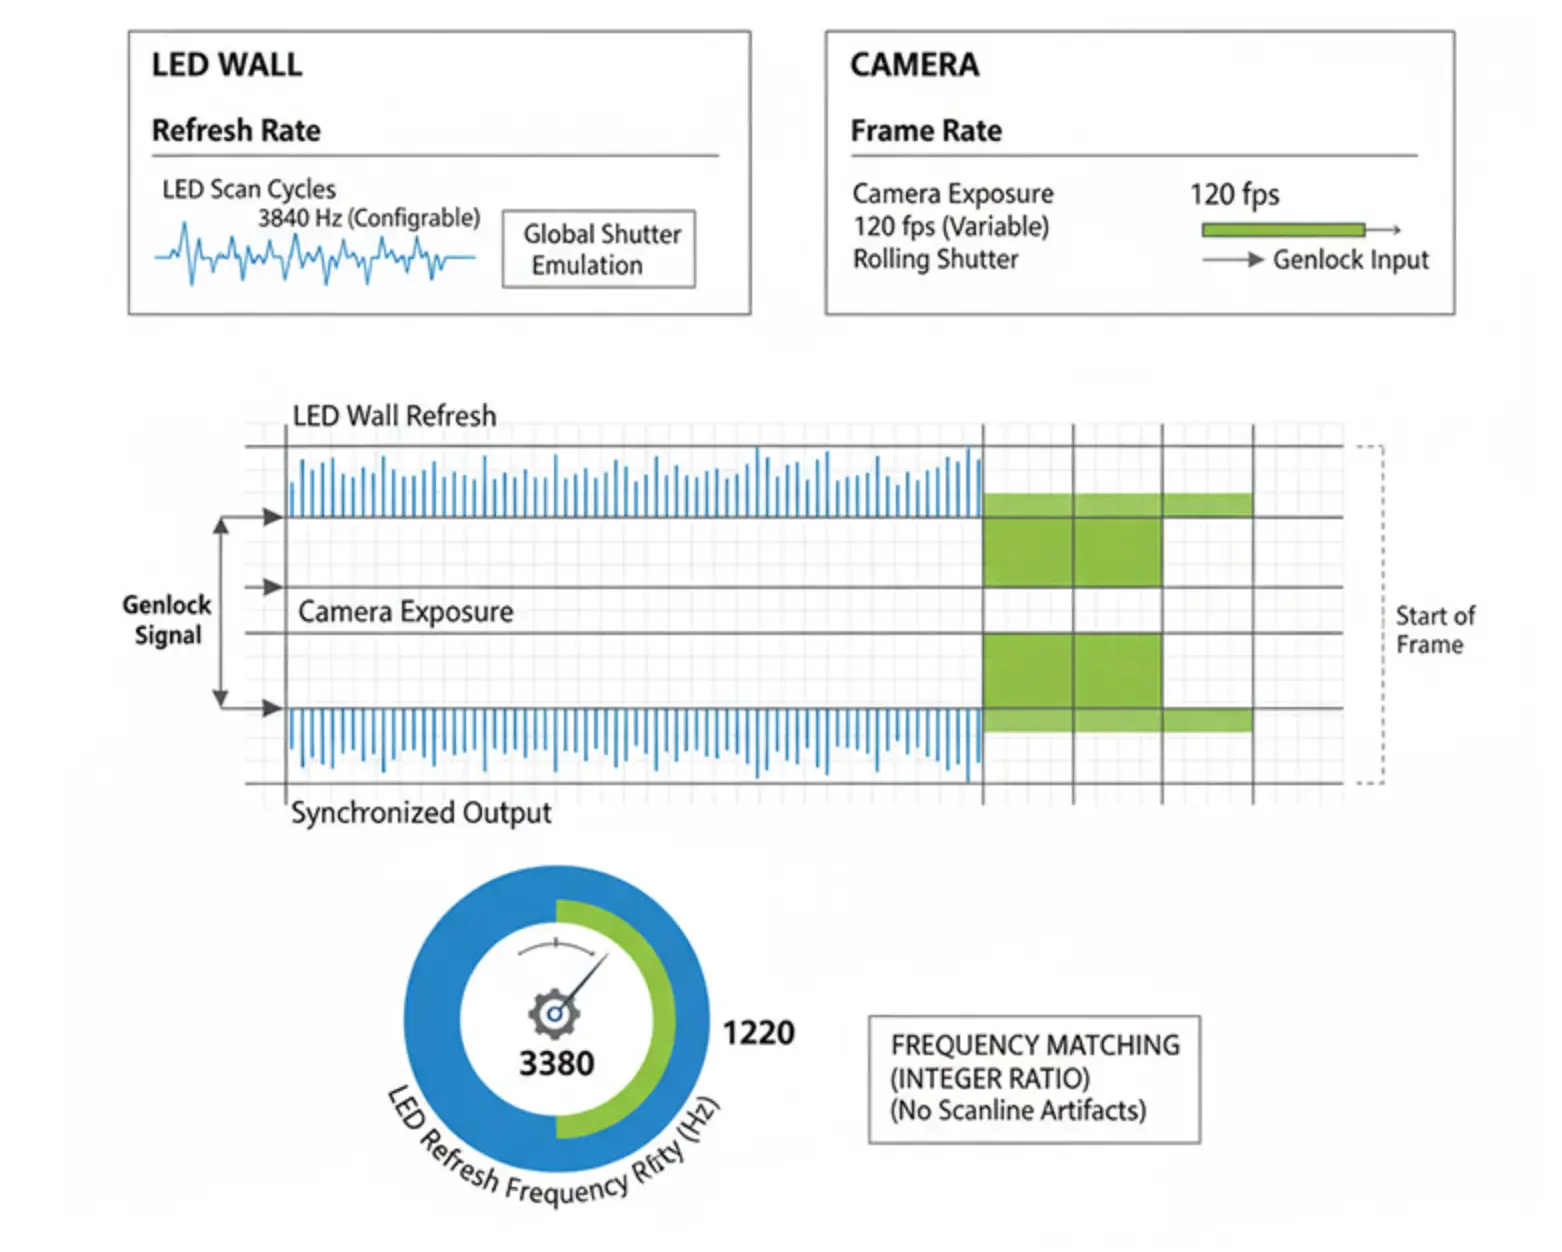
จอภาพ LED คือตารางขนาดใหญ่ของหลอดไฟปล่อยแสง (LED) โดย อัตราเฟรชเรต (จำนวนครั้งที่ตารางอัปเดตต่อวินาที) และกล้อง อัตราเฟรม (จำนวนเฟรมที่บันทึกต่อวินาที) เป็นระบบเวลาที่เป็นอิสระต่อกัน เมื่อความถี่ของทั้งสองเข้าใกล้กันแต่ไม่ตรงกับพอดี ผลลัพธ์จะเป็นหนึ่งจากสองอย่าง:
• การกระพริบอย่างรวดเร็วหรือ“สโตรโบ”ของพื้นหลัง (เอฟเฟกต์สโตรโบสโคปิก) หรือ
• รูปแบบคลื่นหรือพิกเซลแบบใหม่ (โมเร).
จินตนาการเหมือนนักกลองสองคนตีจังหวะที่เร็วช้าต่างกันเล็กน้อย แทนที่จะได้เสียงประสาน คุณจะได้เสียงรบกวนทางสายตา.
ผลสโตรโบสโคปิก: การแสดงแสงที่ไม่พึงประสงค์
เอฟเฟกต์สโตรโบสโคปิกคืออะไร?
จอ ผลสโตรโบสโคปิก (Stroboscopic effect) ปรากฏขึ้นเมื่อกล้องวิดีโอจับภาพผนัง LED ในช่วงวงจร “เปิด/ปิด” ถ้าชัตเตอร์ของกล้องบันทึกภาพแบบผสมระหว่างสถานะ “เปิด” และ “ปิด”.
ผนัง LED ไม่ได้แสดงเนื้อหาอย่างต่อเนื่อง แต่รีเฟรชอย่างรวดเร็ว โดยปกติประมาณ 50-60 ครั้งต่อวินาที (หรือเร็วกว่านั้น) กล้องของคุณก็ถ่ายทำภาพในช่วงเวลาเฉพาะเช่นกัน โดยปกติ 24, 30 หรือ 60 เฟรมต่อวินาที เมื่อความถี่ทั้งสองนี้ไม่ตรงกันพอดี คุณจะได้ผลลัพธ์ทางสายตาเปรียบเสมือนเมโทรนอมสองตัวที่เดินจังหวะเร็วช้าต่างกันเล็กน้อย ผลลัพธ์คือเอฟเฟกต์กระพริบหรือมัวที่อาจทำให้ผนังทั้งใบดูเหมือนกระพริบหรือสโตรโบ.
ทำไมถึงเกิดสิ่งนี้ขึ้น?
ผนัง LED ใช้เทคนิคที่เรียกว่า PWM (Pulse Width Modulation) to control brightness levels. Instead of varying the voltage, they turn the LEDs on and off very quickly, with the ratio of “on” time determining how bright each LED appears.
Think of it like trying to photograph a blinking light with a camera. If you catch it while it’s on, it’s bright. If you catch it while it’s off, it’s dim. If you catch it right as it’s transitioning, you get inconsistent brightness across the frame. Now multiply this by millions of LEDs, and you can see why things get complicated.
ลายมัวเร (Moiré Pattern): ปัญหาการรบกวน
What is Moiré Pattern?
Moiré is an interference pattern created when two periodic grids—
In LED wall shooting, moiré patterns occur when your camera’s sensor grid (the pixel array) interacts with the LED wall’s grid structure. Both are essentially repeating patterns of light and dark areas, and when they don’t align perfectly, they create new patterns that can make the wall appear to have wavy, swirling, or even pixelated effects that weren’t there in the original content.
The Mathematics Behind the Madness
Moiré is a manifestation of beat frequency: the difference between two spatial frequencies (the camera’s pixel pitch and the wall’s LED pitch). When two frequencies are close but not identical, they create a new frequency that’s the difference between them.
When your camera’s pixel pitch (the distance between pixels on your sensor) is roughly 1-3 times the LED pitch (the distance between LEDs on the wall),the interference becomes strongest, you’re in the danger zone.
แนวทางแก้ไข: วิธีรับมือ
Below is a consolidated toolbox. Choose the combination that works best for your setup.
Tackling Stroboscopic Effects
| Method | How it works | Tips |
| Frame‑rate alignment | Match your camera’s fps to the wall’s refresh rate (e.g., 60 Hz → 60 fps; 30 fps if the wall can sync). | Verify the actual refresh rate; some walls can output multiple rates depending on content. |
| Shutter speed (narrower angle) | Shorten exposure so each frame sees a single LED state. | Expect higher ISO or more lighting to compensate. |
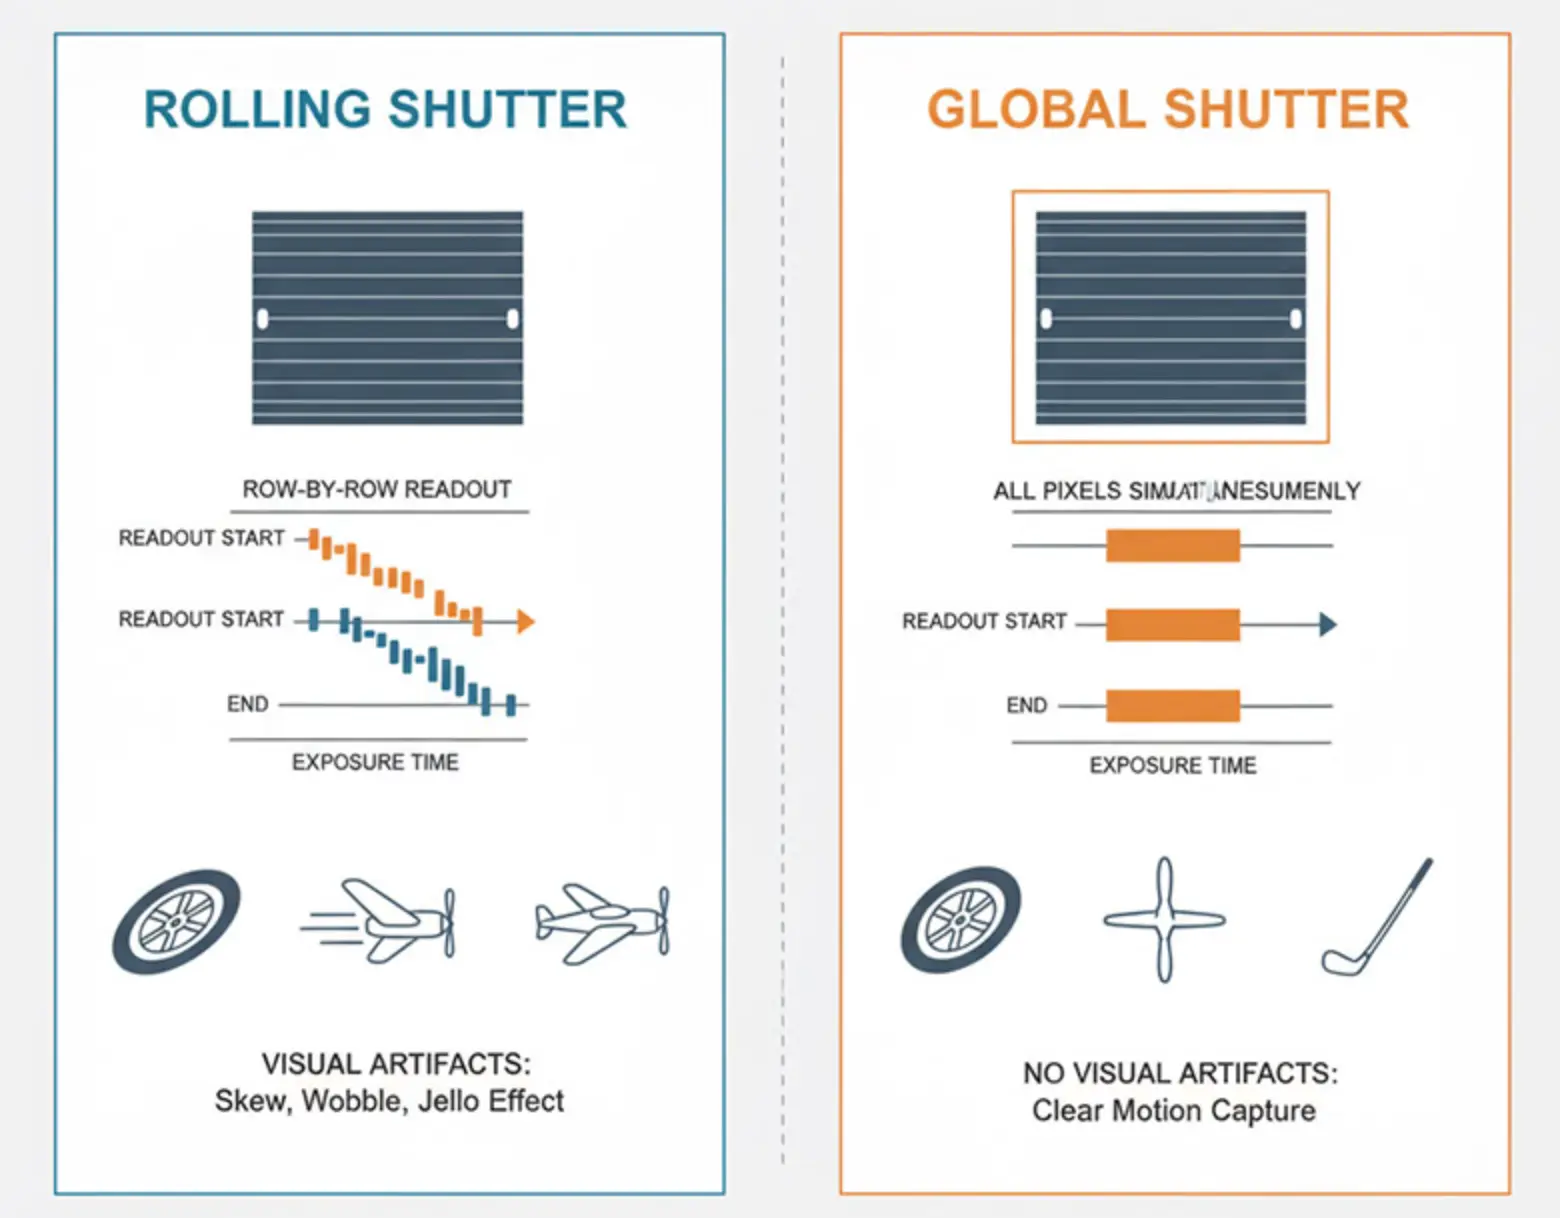
| Global‑shutter cameras | All pixels are read simultaneously, reducing “mixing” of LED states. | They are costlier but often worth it for critical shoots. |
| Readout modes (ERS/rolling‑shutter optimization) | Some cameras offer faster sensor readouts that can “skip” problematic cycles. | Check your camera’s menu for “fast readout” or “electronic shutter” options. |
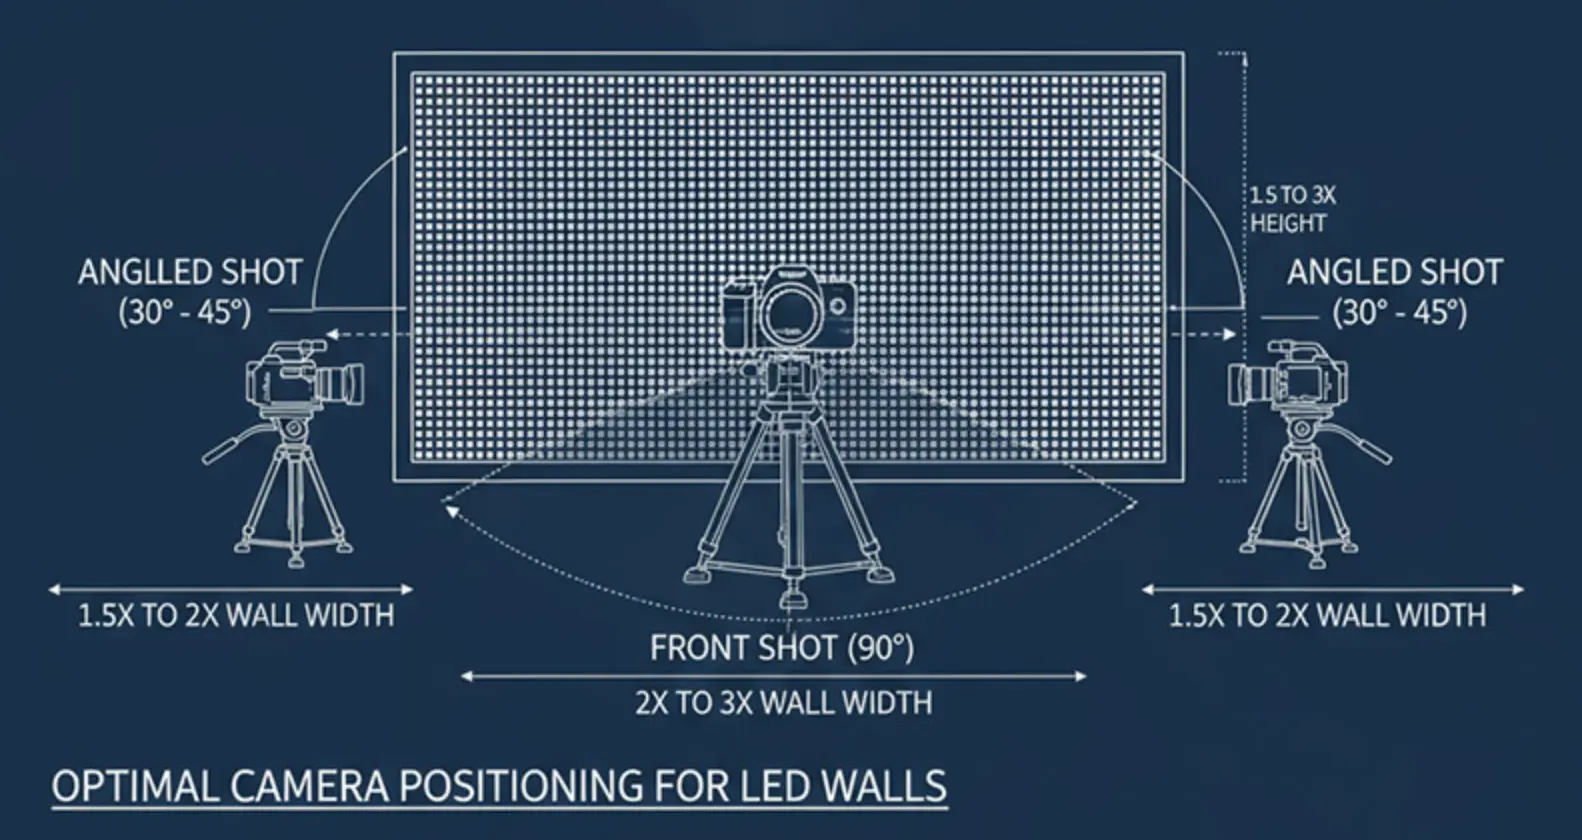
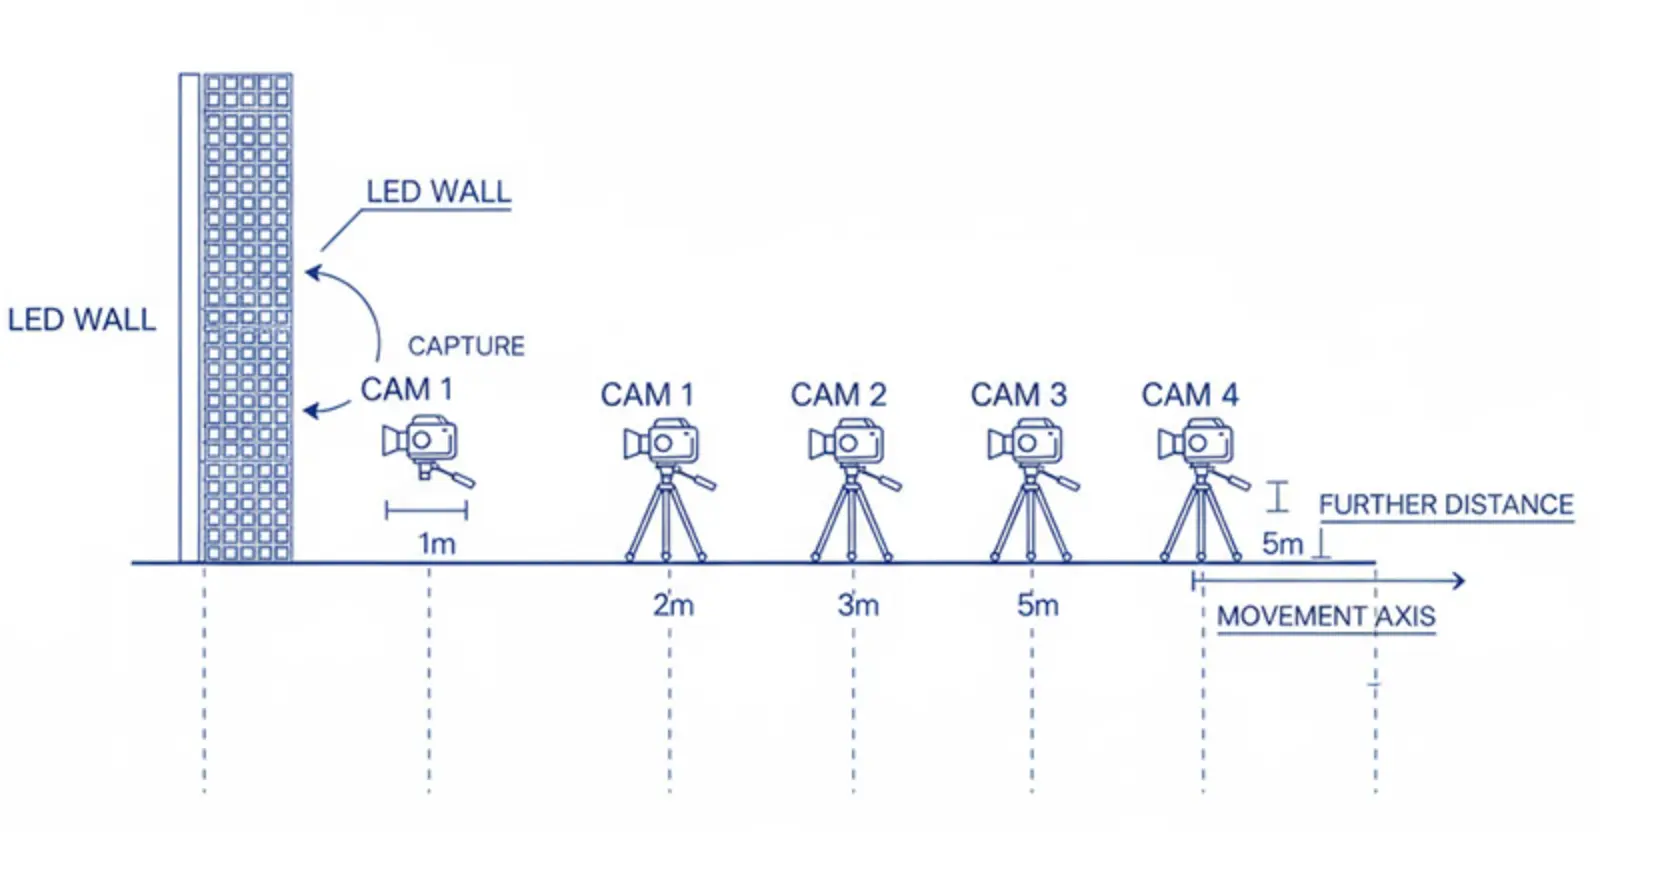
| Increase distance & angle | Greater camera‑wall separation reduces the proportion of the wall within the sensor’s field of view, lowering the chance of timing clashes. | A few extra meters can make a dramatic difference. |
| ND filters / aperture tweaks | Minor optical attenuation can dampen flicker without changing timing. | Use sparingly; they may reduce overall brightness. |
Conquering Moiré Patterns
| Method | How it works | Tips |
| Adjust distance & angle | Small changes (a few centimeters or a slight rotation) move the sensor‑grid relationship out of resonance. | Test incrementally; results can vary dramatically across inches. |
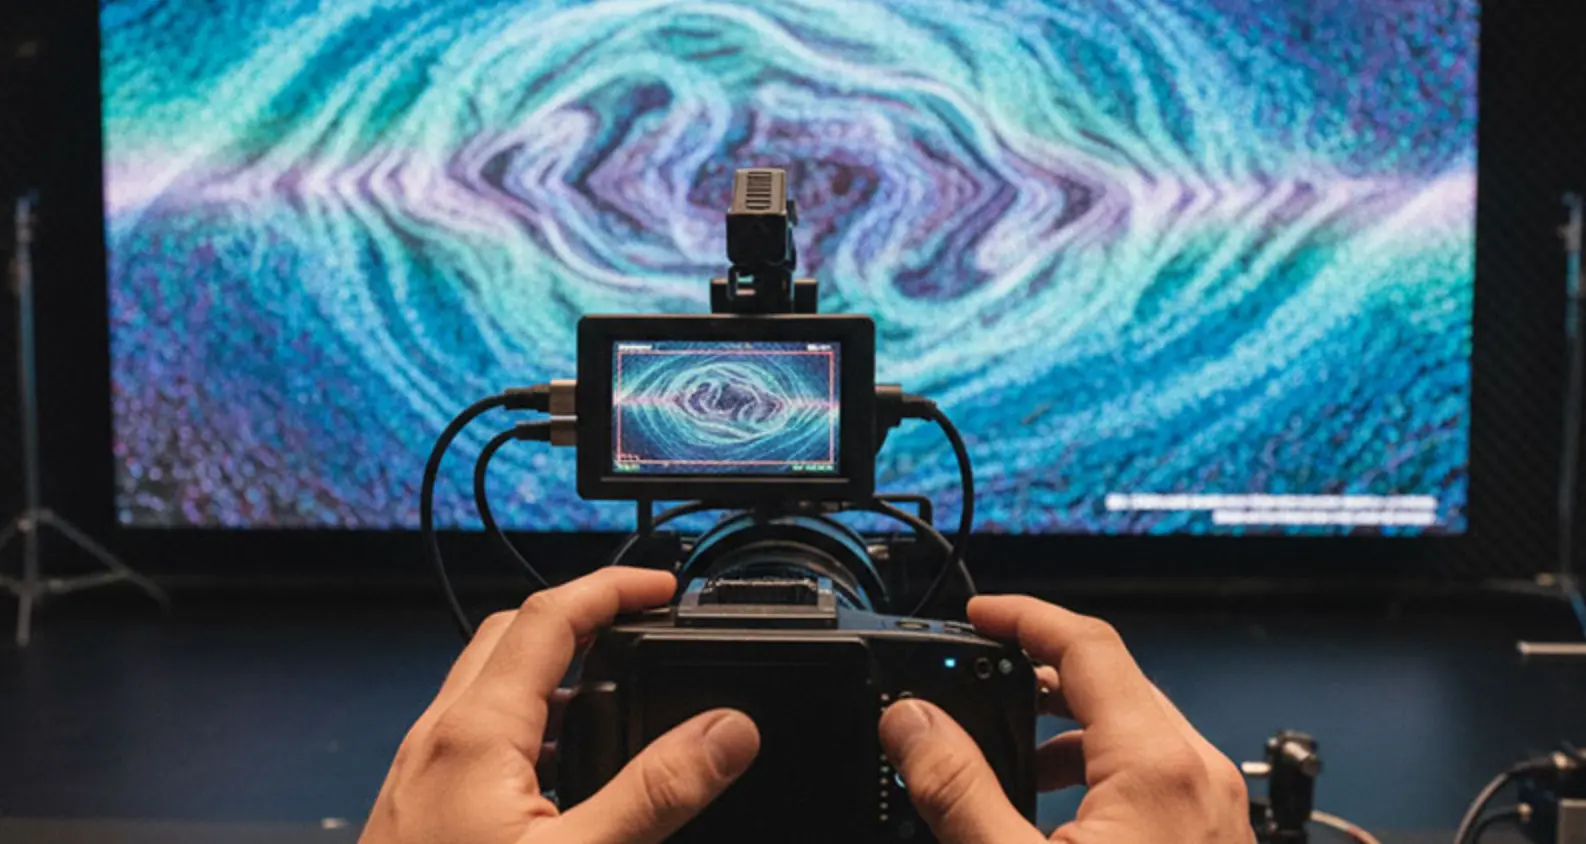
| Light defocus (slight out‑of‑focus) | A small focus blur smooths the interference pattern without softening the subject. | Keep blur minimal; over‑defocus can make the wall look hazy. |
| Pixel‑shift or sensor‑shift | Shifting the sensor (or using pixel‑shift technology) changes the sampling lattice relative to the LED grid. | Useful on high‑end mirrorless/DSLR models that support this. |
| Resolution mismatch | Choose a camera whose pixel count does not divide evenly into the wall’s pixel count (or vice‑versa). | If the wall is 1920×1080, a 24‑MP sensor often avoids the 1:1 ratio. |
| Dedicated “camera‑friendly” mode | Some LED walls have a mode that switches the PWM frequency to a pattern less likely to cause interference. | Expect a slight drop in color fidelity; test before shooting. |
เทคนิคขั้นสูงและเคล็ดลับระดับมืออาชีพ
The Sweet Spot Method
Professional cinematographers often locate a sweet‑spot distance—a location where both stroboscopic and moiré artifacts are minimized. Achieving it typically requires a few test shots, but the result can differ markedly from positions just a few inches away.
Electronic Solutions
LED‑wall camera‑friendly presets – many manufacturers offer “broadcast” or “studio” modes that modify PWM and refresh patterns.
Real‑time synchronization – some high‑end systems can lock the wall’s refresh to the camera’s frame timing (e.g., Genlock or PTP), eliminating flicker outright.
Lighting Balance
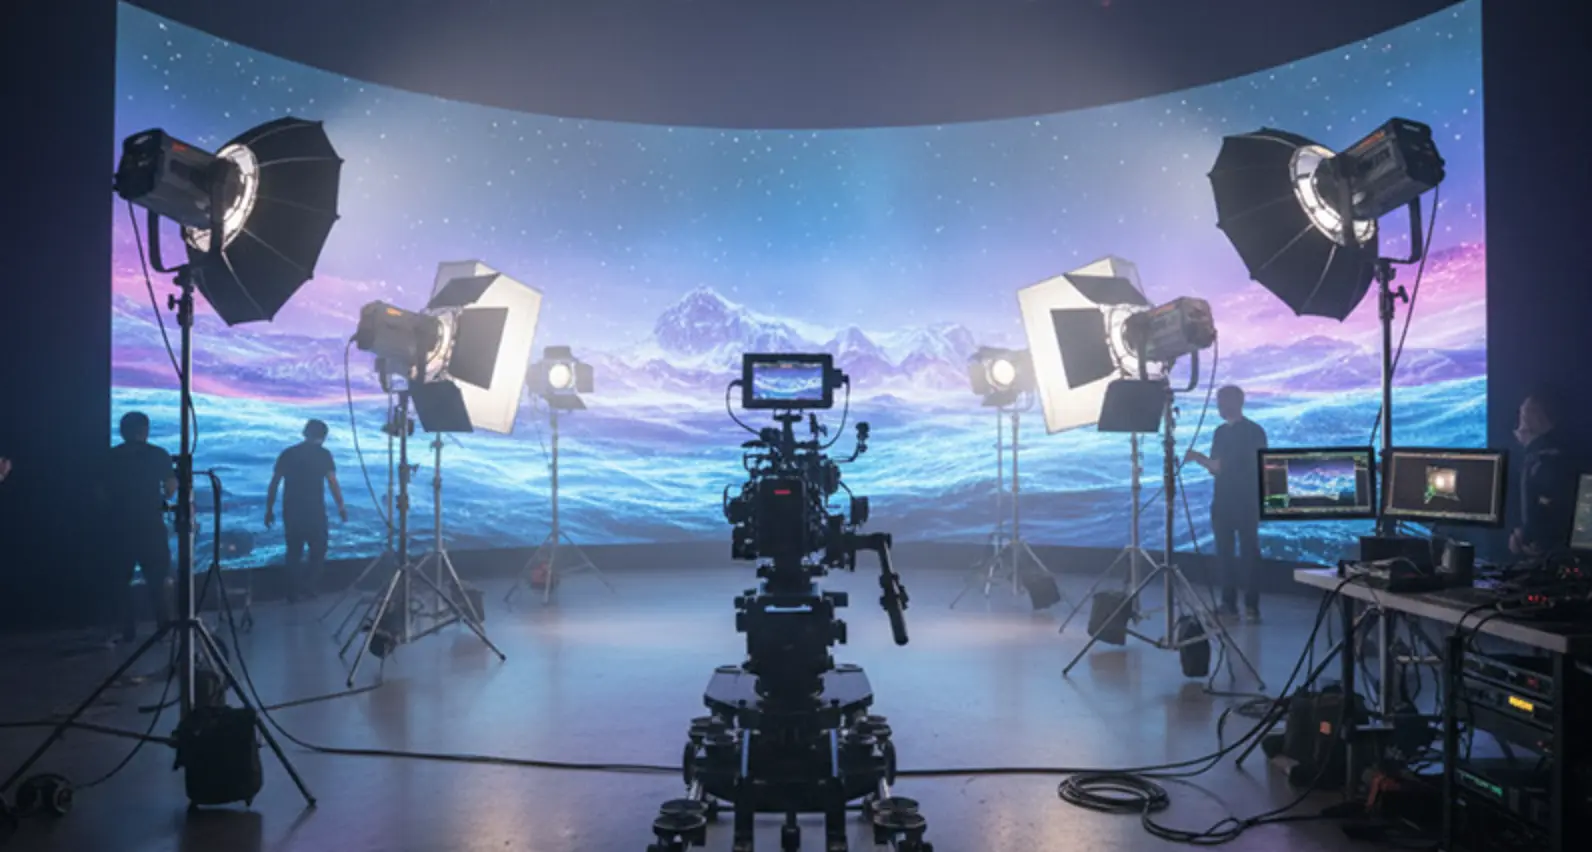
Use additional lights (softboxes, panels, or reflectors) to blend with the wall’s own illumination. Balancing the overall exposure reduces the perceived impact of any residual strobe or moiré, especially when the wall’s content is dynamic.
ขั้นตอนการแก้ไขปัญหา: คู่มือทีละขั้นตอน
| Step | Action | What to Look For |
| 1️⃣ Pre‑shoot assessment | Review wall specs: refresh rate (Hz), pixel pitch, available “camera‑friendly” modes. | Note whether the wall can switch to 60 Hz, 50 Hz, 120 Hz, etc. |
| 2️⃣ ถ่ายทดสอบ | ถ่ายด้วยความเร็ว fps/ค่าชัตเตอร์ที่แตกต่างกัน (เช่น 24 fps + 1/48 วินาที, 30 fps + 1/60 วินาที, 60 fps + 1/120 วินาที). | สังเกตความรุนแรงของแสงกะพริบ; เลือกค่าที่มีภาพกะพริบมองเห็นได้น้อยที่สุด. |
| 3️⃣ ทดลองจัดตำแหน่ง | เริ่มจากระยะใกล้ จากนั้นเลื่อนกล้องออก; พยายามเปลี่ยนมุมเล็กน้อย (5–10°) ด้วย. | จดบันทึกลายโมเร (moire) หากมี; รักษาวัตถุให้คมชัดขณะปรับตั้ง. |
| 4️⃣ ปรับจูนละเอียด | ทำ micro-adjustment ต่อระยะ มุม และโฟกัส เพื่อลดข้อบกพร่องทั้งสองอย่างพร้อมกัน. | ในอุดมคติ กำแพงควรเรียบ และวัตถุควรคมชัด. |
| 5️⃣ ตรวจสอบเนื้อหา | ตรวจสอบว่าเนื้อหาบนผนัง (การเคลื่อนไหวเร็ว, รูปแบบความถี่สูง, สีทึบ) ตอบสนองแตกต่างกันหรือไม่. | สำหรับรูปแบบความถี่สูง พิจารณาการเบลอเล็กน้อยหรือใช้กล้องความละเอียดสูง. |
การพัฒนาในอนาคต: สิ่งที่จะเกิดขึ้นต่อไป
เทคโนโลยีกำลังพัฒนาตลอดเวลา เรามองเห็นผนัง LED ที่มีอัตราเฟสรีเฟรชสูง โหมดความเข้ากันได้กับกล้องที่ดีขึ้น และระบบที่ปรับอัตโนมัติตามค่ากล้องที่ตรวจพบ เทคโนโลยีกล้องก็ก้าวหน้าอย่างรวดเร็วเช่นกัน โดยมีเซ็นเซอร์ใหม่ที่ใช้ thuậtการประมวลผลที่ซับซ้อนเพื่อลดสิ่งประดิษฐ์ทางอิเล็กทรอนิกส์ในกล้อง.
ตัวอย่างการประยุกต์ใช้จริง
งานอีเวนต์: เมื่อถ่ายทำคอนเสิร์ตสดด้วย ฉากหลังเวที LED, เป้าหมายมักจะเป็นการทำให้ผู้ชมได้รับประสบการณ์ภาพที่ไร้รอยต่อขณะจับภาพคุณภาพการออกอากาศสำหรับสตรีมมิงหรือบันทึก.
งาน CORPORATE: ผนัง LED พบได้มากขึ้นใน การนำเสนอขององค์กร, where executives might need to be filmed speaking in front of dynamic, branded backdrops.
Film and Television: From futuristic sci-fi scenes to contemporary dramas set in offices or homes, LED walls offer unprecedented flexibility in creating backgrounds that can change instantly.
สรุป: เส้นทางสู่การเป็นมืออาชีพด้านจอ LED
LED wall shooting is fundamentally about understanding the relationship between camera sensors and LED display grids. The technical challenges of stroboscopic effects and moiré patterns require both technical knowledge and creative problem-solving skills.
Key Tkeaways:
• Stroboscopic effects occur when camera frame rates conflict with LED wall refresh rates; solution: match frame rates or adjust shutter speeds
• Moiré patterns result from sensor and LED grid interference; solution: change camera position, angle, or use slight defocus
• Distance is your friend – small positional adjustments can dramatically improve results
• Test extensively – each LED wall setup responds differently to camera settings
Content awareness: Some LED content is inherently more camera-friendly than others
By applying these principles—understanding the timing conflict, applying the appropriate technical fixes, and experimenting with positioning—you can turn LED‑wall shooting from a technical headache into a powerful creative asset.
บทความที่เกี่ยวข้อง